The Veeam Service Provider console is a secure portal offering remote monitoring & management, licensing reporting for remote Veeam instances. It even includes a billing engine, customer dashboard for self service which is customisable to meet your brand requirements.
Basically it's a no brainer for Veeam Service Providers (VCSP) dealing with remote backup environments.
One function I like about it is that it has a fully featured API to allow for automated tenant creation and integration into existing systems... let's dive into the first use case, creating a new customer (tenant).
Getting Started (Authenticating)
The first thing you need to know is by default the API lives on port 1281 - so you will be talking to https://veeamspc:1281 for all requests.
Secondly, if you want to have a play with the API there is a swagger interface published too, available at /swagger on your API site, so as an example https://veeamspc:1281/swagger
Update to the above, the v3.X api actually lives on https://veeamspc:1280/api - you can get to the swagger via /api/swagger or click the link
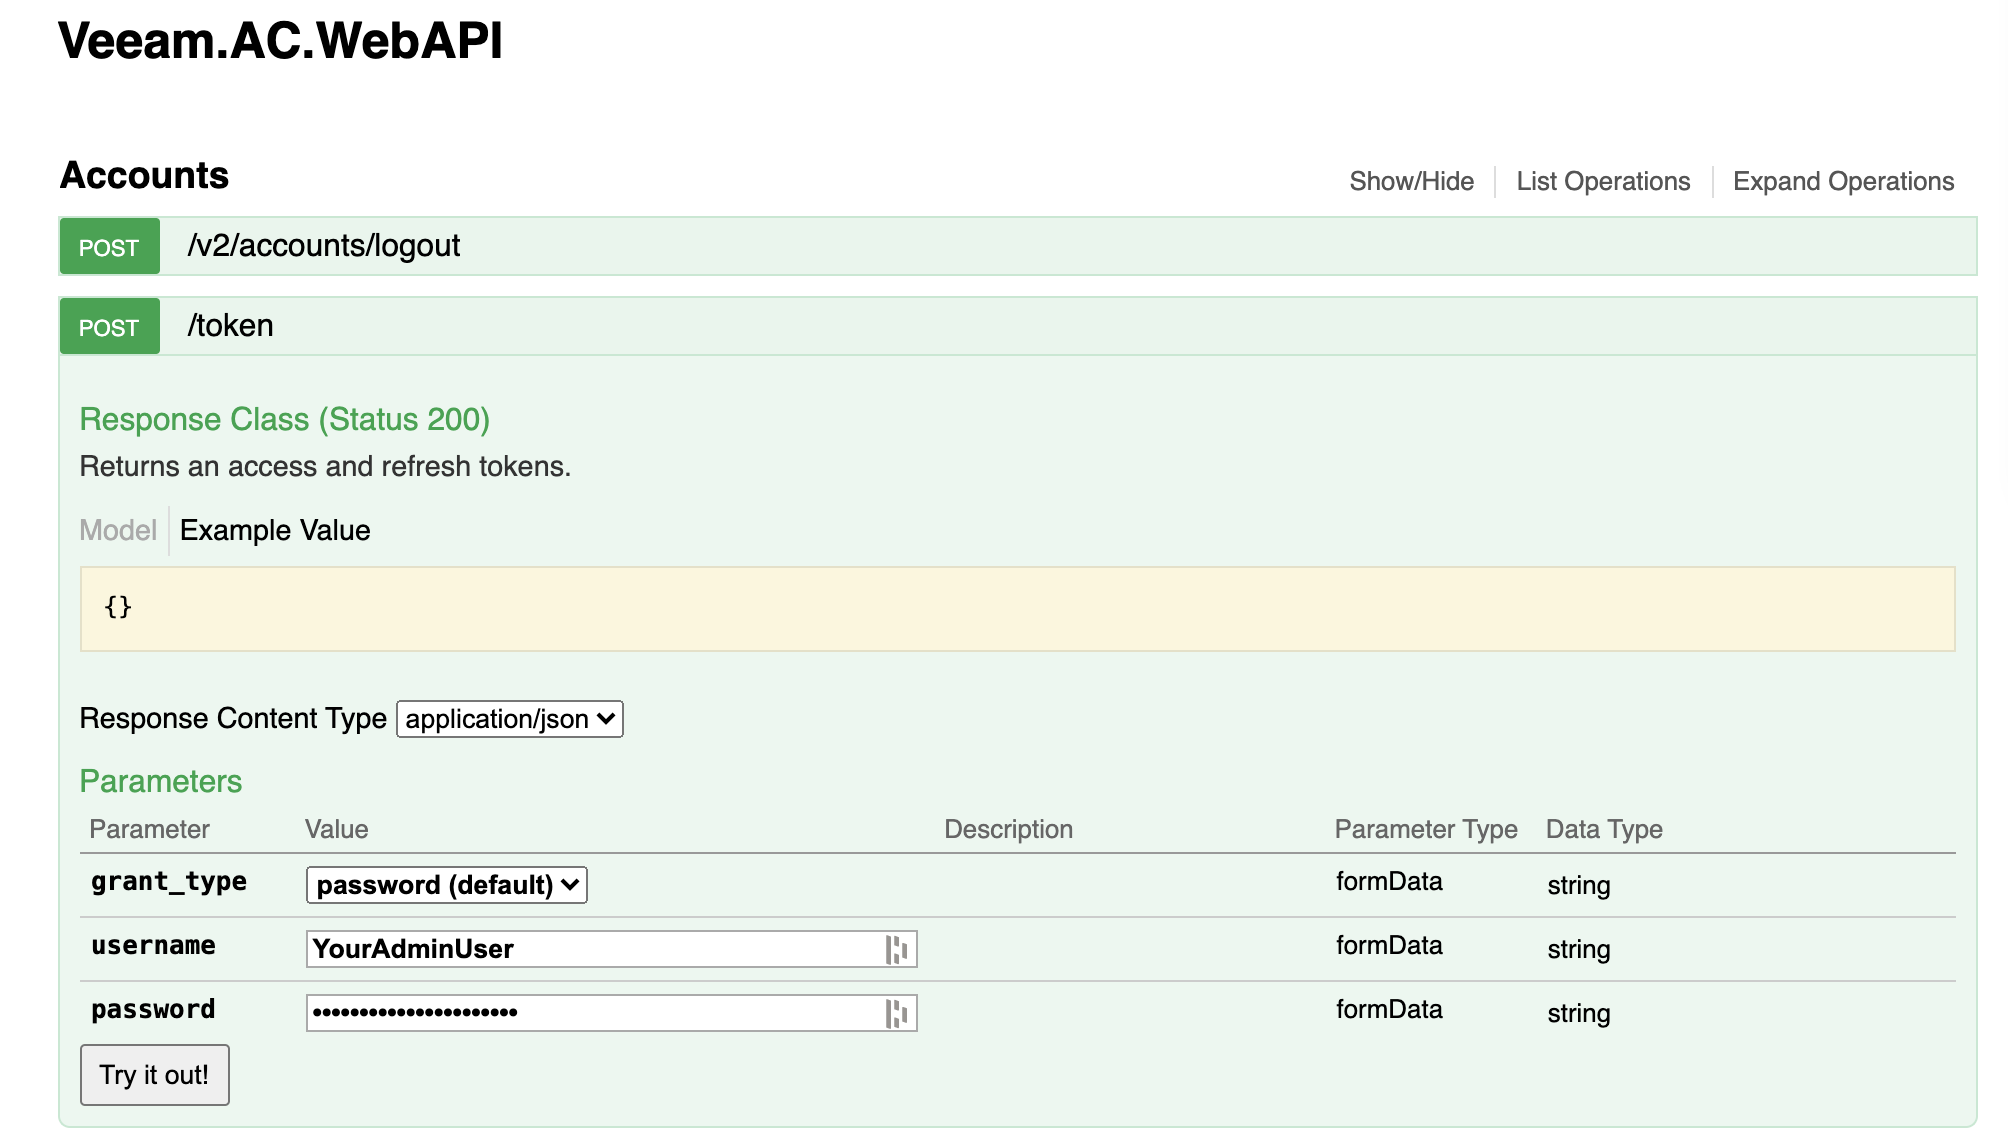
Before you can make any requests you must Authenticate - you can do this in the swagger interface if you like then start browsing around it will inset your api_key (bearer token) up the top for you once you login, to to do that hit up the Accounts section and the POST /token item, fill in your details then hit "Try it out!"
But that's as much Swagger as I am going to show you, let's do this properly in Postman which i find a little nicer to work with when investigating API usage.
In postman, get your bearer token by doing the following, hit New Request then;
- Type == POST
- URL == https://veeamspc:1281/token
- Select Body tab, then x-www-form-urlencoded
- Enter in values for username, password and grant_type (note, grant_type is "password")
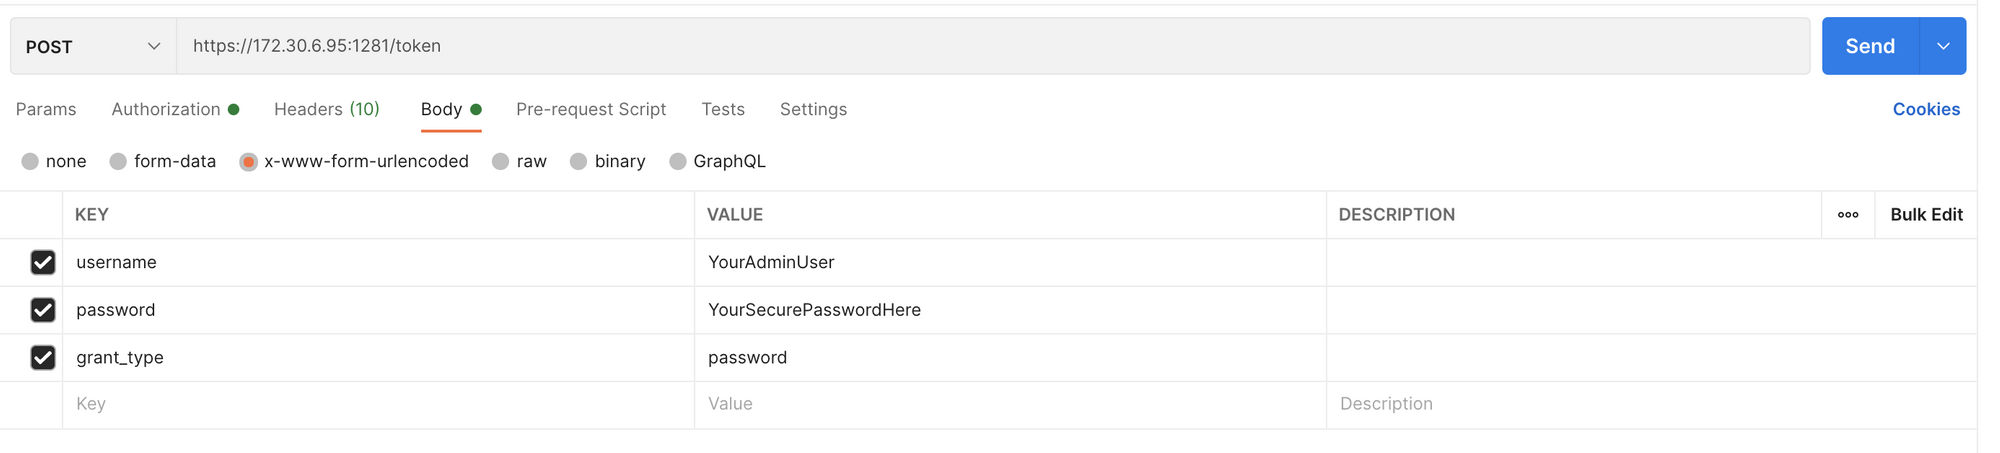
Like the above, then hit Send. This will return you some data if you got the credentials correct otherwise it will say as much. What we need for future requests is the access_token.
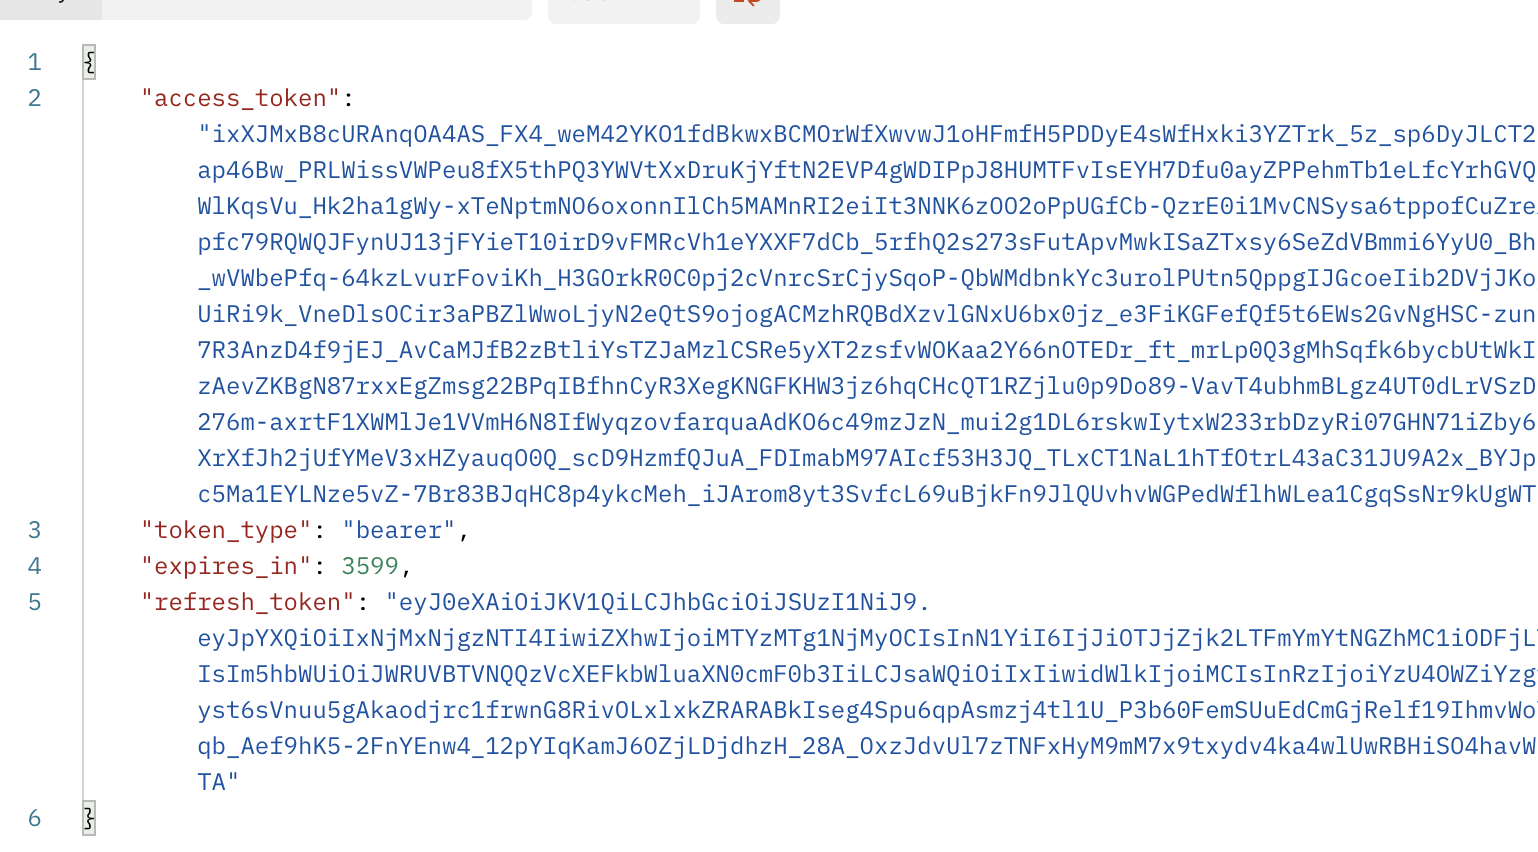
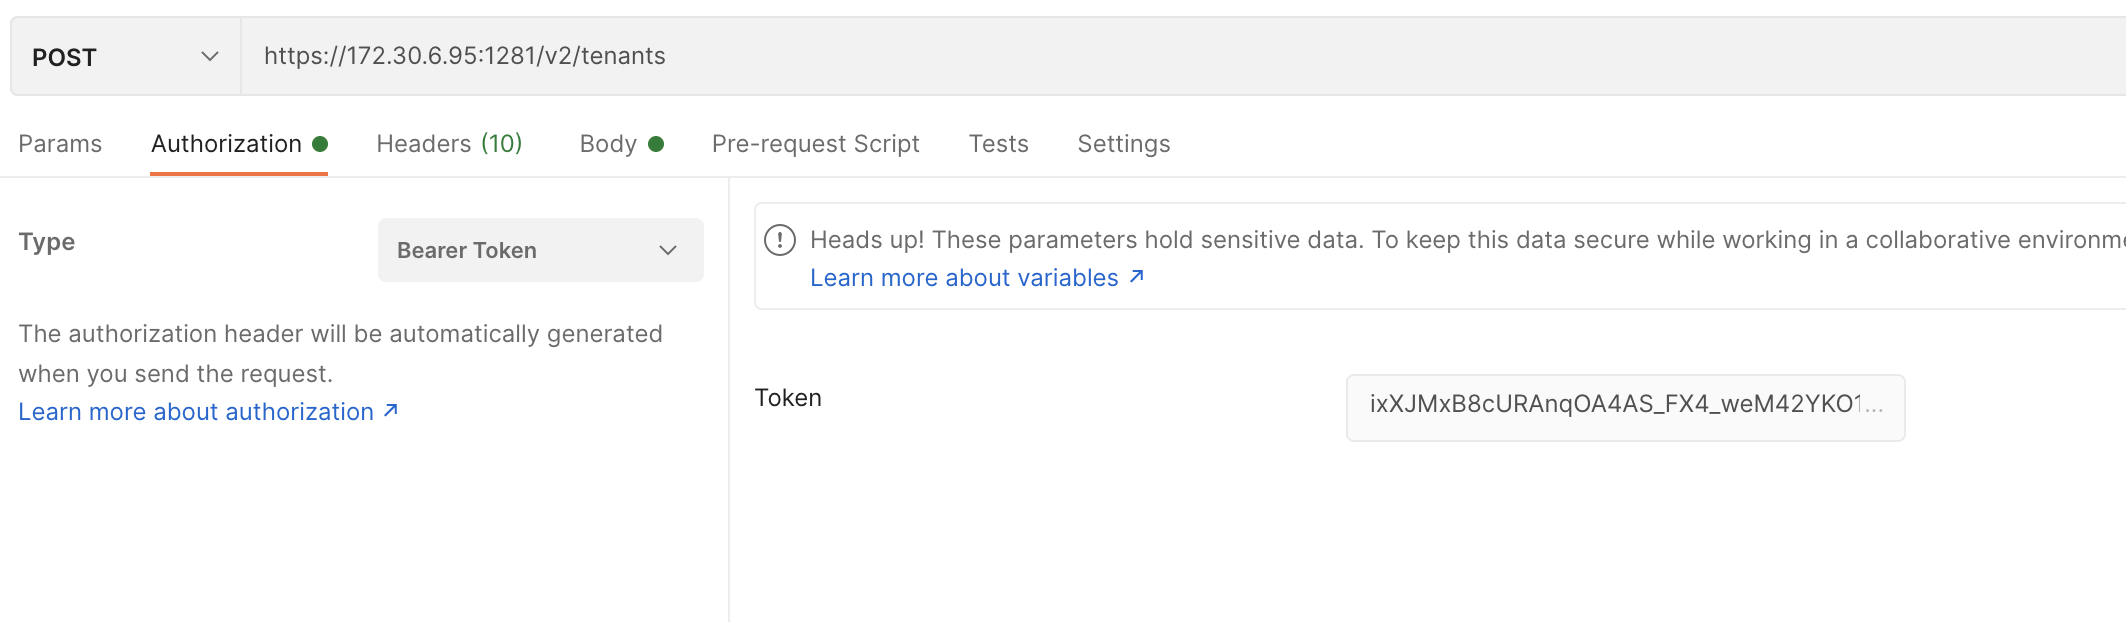
Now, all future requests below will assume you have put this value into the Authorization tab in the request like so.
Step 1, Backup Servers
One of the bits of information you need to create a tenant is the cloudConnectAgentUid, this is effectively the guid of the installed agent on the backup and replication server you want to target.
So, in order to automate this you need to fetch your desired backup server using the api.
You can do a GET to /v2/backupServers this will return all backup servers associated with your service provider console, including those of tenants. So you will want to use the ones the isCloudConnect property is true.
Pro tip, you can filter using OData style, simply append a $filter querystring value with your filter
Example: based on our "isCloudConnect" requirement to get the cloudConnectAgentId we can filter using /v2/backupServers?$filter=isCloudConnect eq true
You can also filter on name etc as required
The filtered result will now only bring back the filtered results
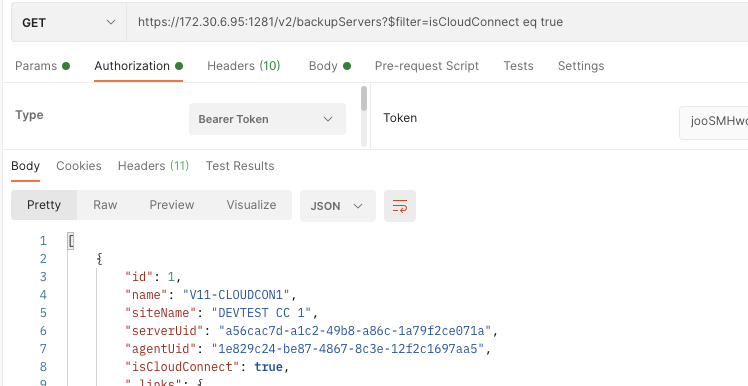
You can now grab that "agentUid" property in the result set in our case 1e829c24.....
Step 2, Creating the tenant (customer)
I am going to show the absolutely bare bones tenant creation, this is the minimum you need. All of the properties are defined here for reference;
Properties you cannot set during creation however are;
- id
- instanceUid
- siteName
- isEnabled
- gatewayPools
- vMsBackedUp
- vMsReplicated
- vMsBackedUpToCloud
- managedPhysicalWorkstations
- managedCloudWorkstations
- managedPhysicalServers
- managedCloudServers
- expirationDate
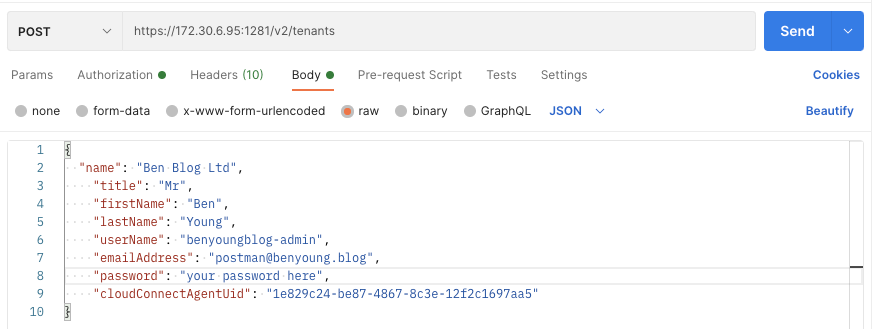
Onto our payload, here is one you can copy and paste and adapt to your requirements.
{
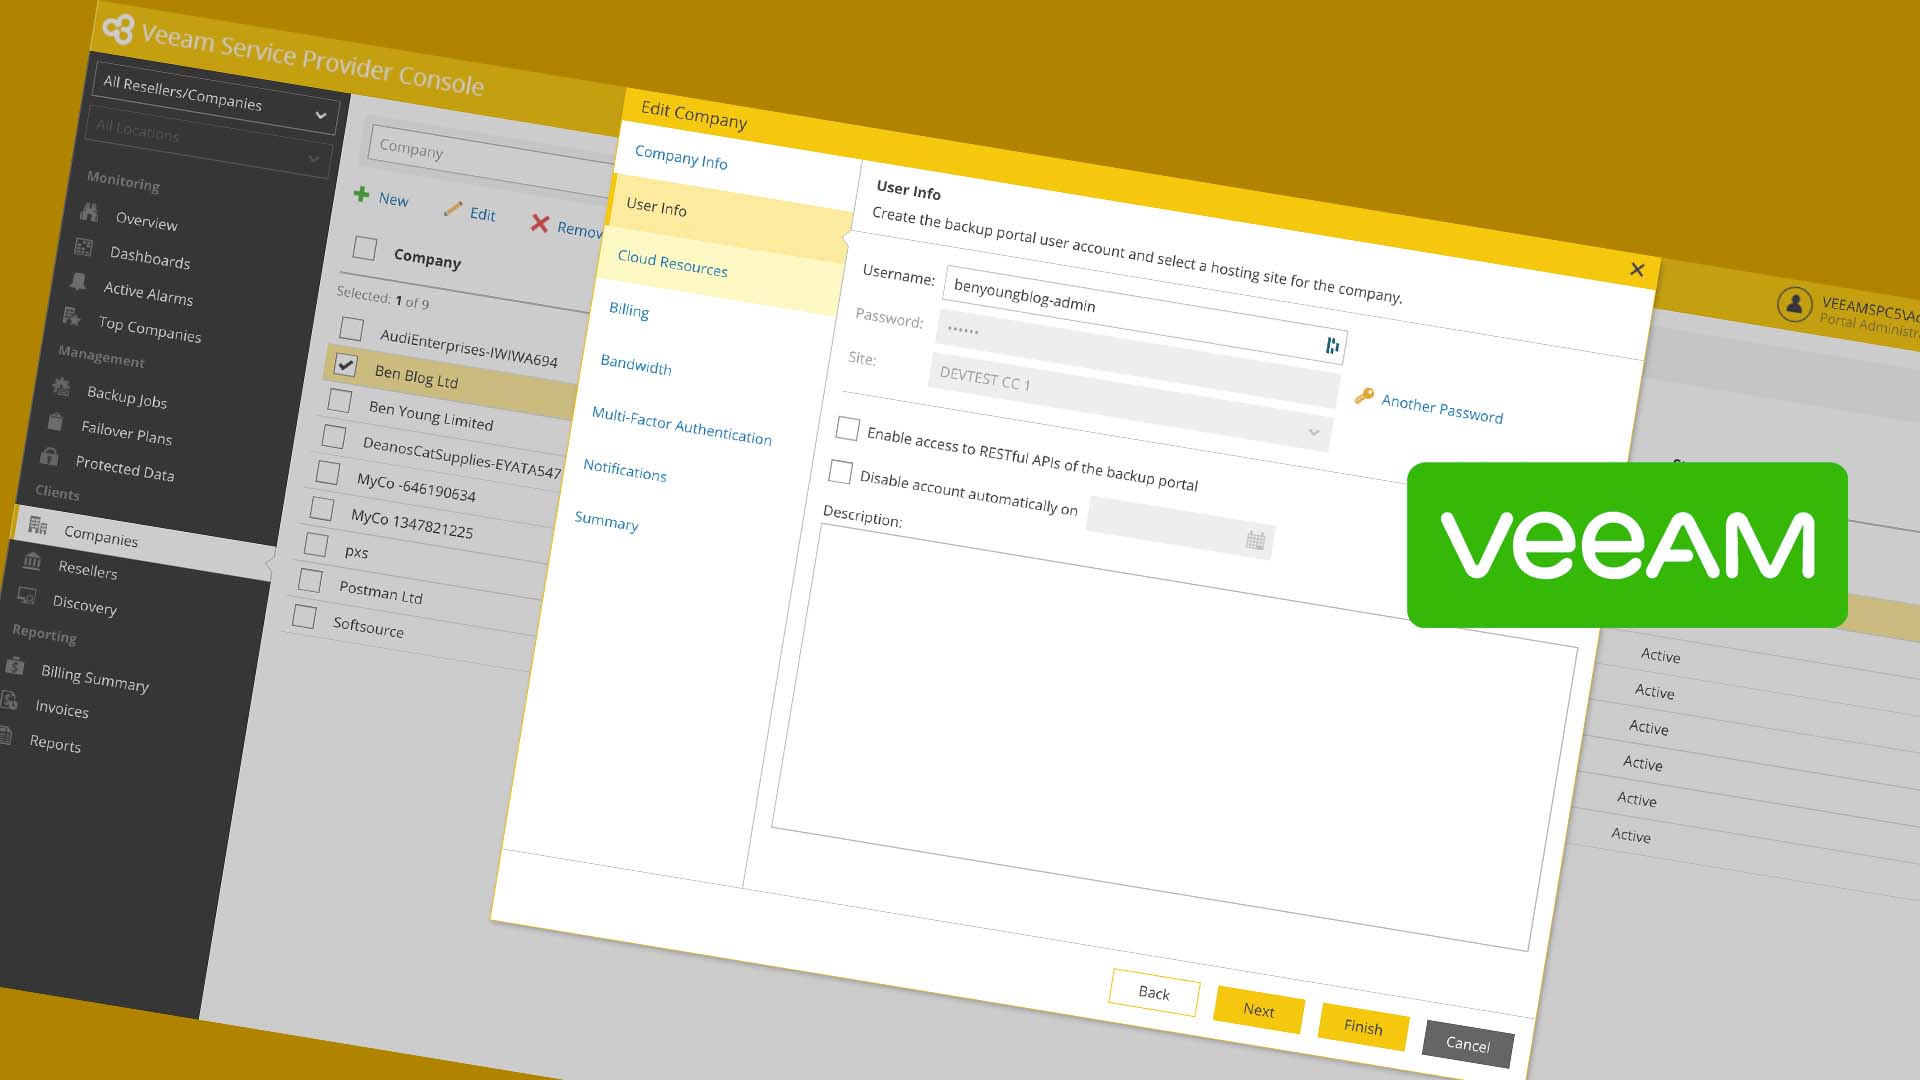
"name": "Ben Blog Ltd",
"title": "Mr",
"firstName": "Ben",
"lastName": "Young",
"userName": "benyoungblog-admin",
"emailAddress": "postman@benyoung.blog",
"password": "your password here",
"cloudConnectAgentUid": "your agentid guid here"
}
Create a new request, this time a POST to /v2/tenants
Hit up the body tab, select raw and change the type to JSON so you get nice highlighting in the editor. Paste in your payload. Hit Send.
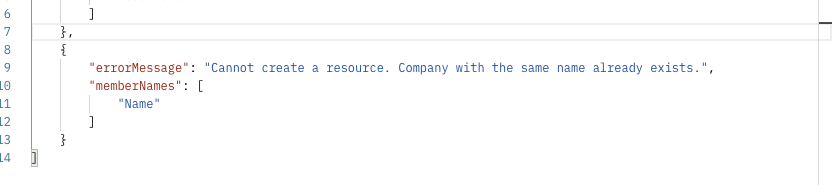
This will take a few seconds to create so just wait for the request to return. Note that Veeam have done a great job here about returning errors and meaninful messages so if something goes wrong and you get an HTTP 400 (or anything but a 201 created) you will be able to see errors, such as the below for client already exists with that name.
But, assuming you got the green light you will have a new cloud tenant object returned - you may elect to save the identifier or other bits of information from this to your other system if you need track it later (remember you can always lookup/filter the tenants result.
Here is my new tenant returned after around 50 seconds on this small dev/test environment.
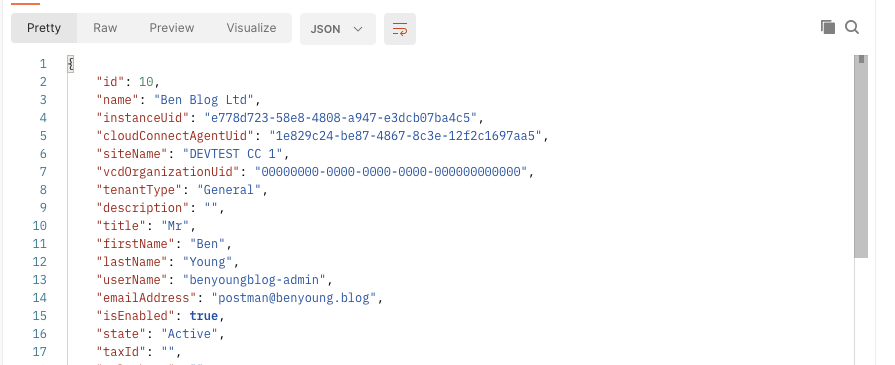
Looking in the SPC now you can also see it there
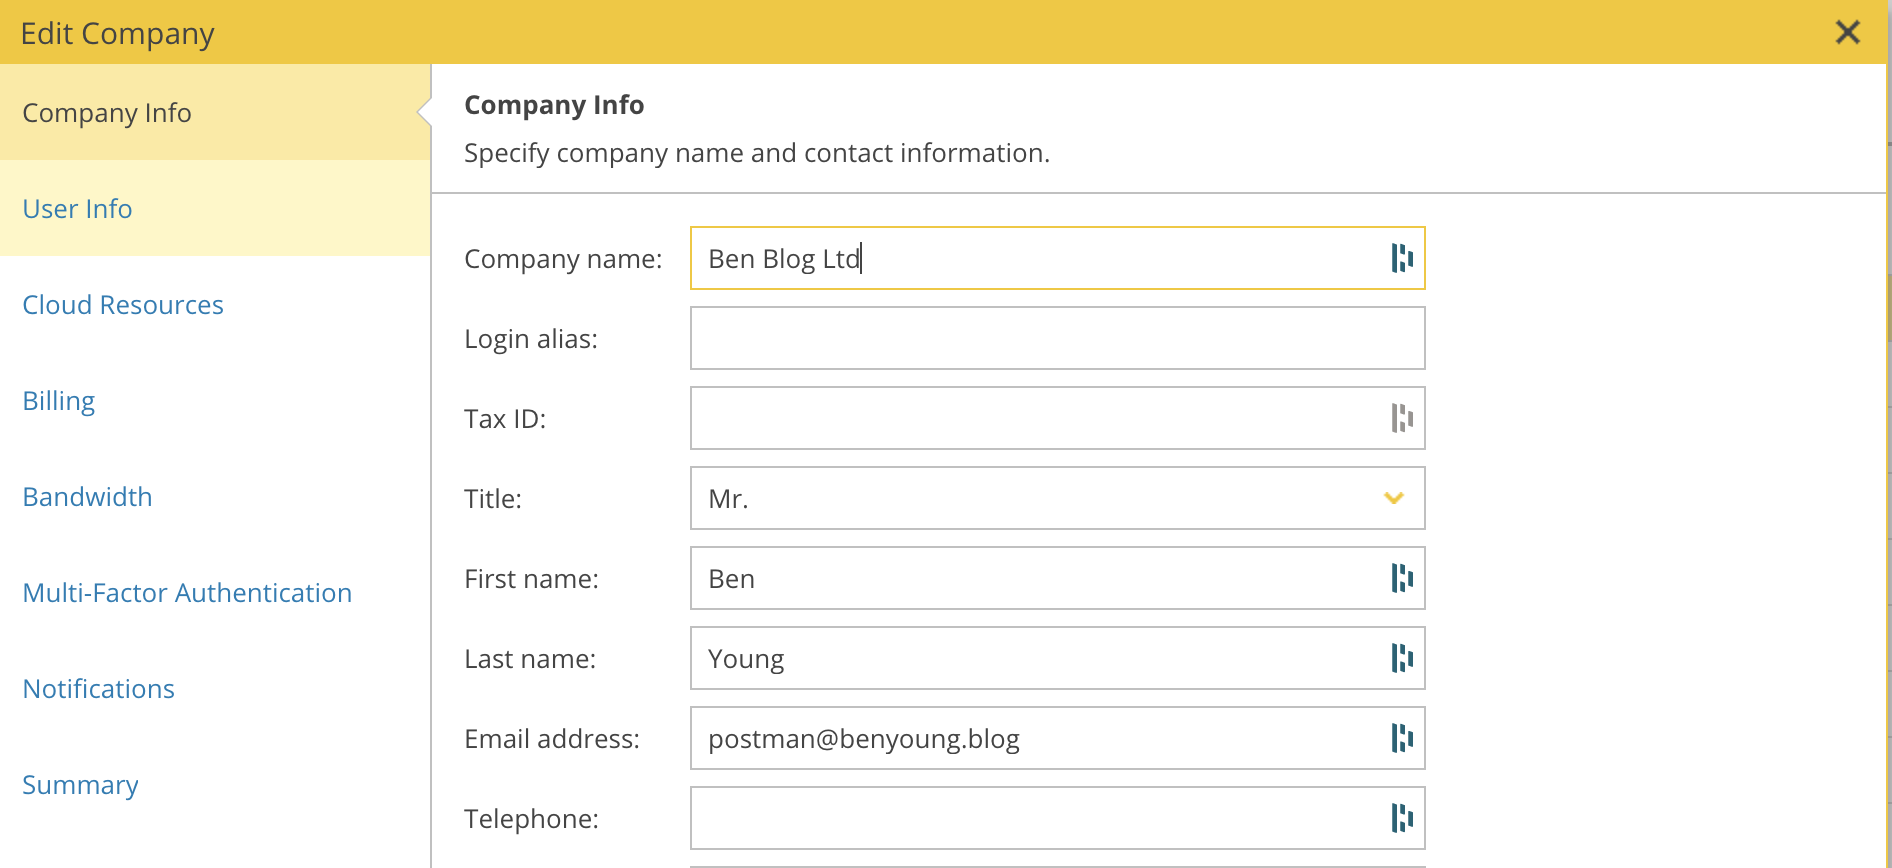
and the cloud tenant has been created so we can link up the remote Backup and Replication server
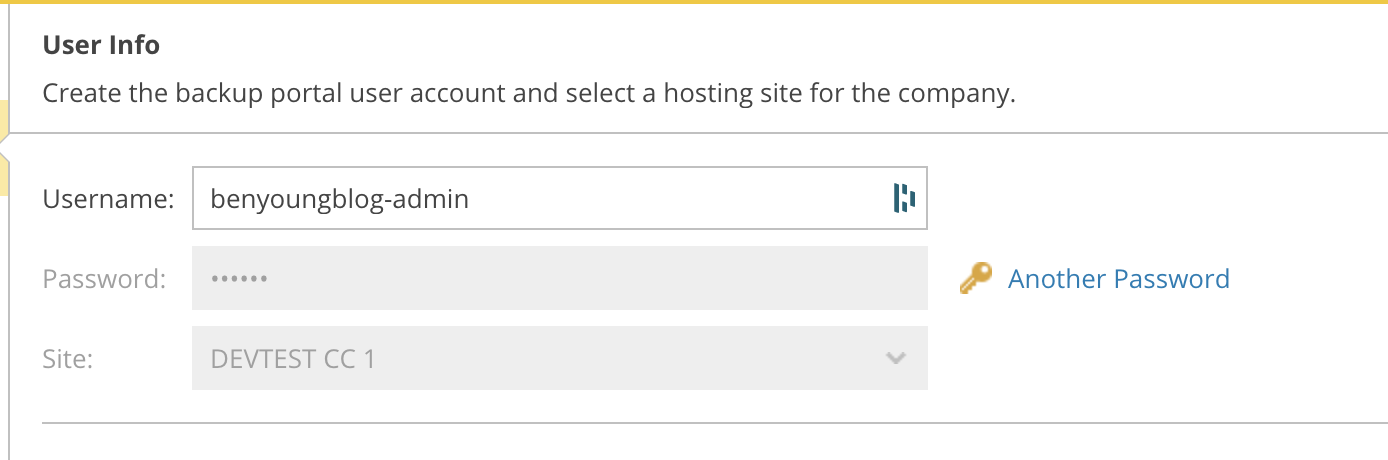
Now you can use these credentials to enter into the remote Backup and replication server and have it managed by this Service Provider console.
In the next post we will cover off automating the addition of cloud backup resources (cloud connect) via the backupResources endpoints, but if you don't intend on offering cloud connect then no need to follow on.
Wrap Up
As you can see there are really only two endpoints you need to hit (1 if you skip/hard code the cloudConnectAgentUid but i dont recommend this).
As we all write in different languages I have used a manual example via Postman here but you can easily translate the handful's of calls mentioned above to your favourite language. I use .NET Core for the framework and RestSharp for the handling of the HTTP requests to the API.
You could very quickly get an example up and running with the invoke-restmethod with powershell or any other language you are familiar with.
Remember the key steps are;
- First, authenticate via /token to get your access_token to be used in the Authentication header
- GET (and bonus points for filtering) your /v2/backupServers endpoints to get the agentUid
- POST TO /v2/tenants with the creation payload (customised as required) to create the tenant
- ... next posts to cover adding resources
