Avoid Egress Fees: Migrate to Veeam Data Cloud Vault v2 Today
Avoiding egress fees is a critical factor when considering any data migration. Hyperscalers typically have bandwidth charges for pulling data out in large volumes, as is often the case with backup data. So what are the options? How can you reduce, or eliminate these costs entirely?
Let’s take a look at the options, but first - Why Migrate to Veeam Data Cloud Vault v2?
Veeam Data Cloud Vault v2 provides a first-party solution that integrates deeply with the Veeam Data Platform. It simplifies cloud storage with all-inclusive pricing, covering storage, transactions, and egress at one predictable rate—no surprises. There are a couple of editions to choose between, Foundation or Advanced Edition, with the Advanced Edition offering “12 nines” of reliability using Azure Blob’s ZRS. Plus, enjoy unlimited restores for seamless backup testing, ensuring compliance and operational confidence.
Decide Your Approach
Understand your existing capacity-tier setup, including retention settings and data volume will help you determine which approach to take.
Option 1: Let Data Age Out
For organizations with shorter retention policies, simply allowing data to age out naturally in Azure Blob might be the easiest path. Once data is no longer needed (you have built up your retention in Vault v2), the Azure Blob storage account can be safely deleted.
If this is your approach you can simply add your Vault v2 as a new extent within your existing Scale-out backup repository (SOBR) and put the old Blob repository into Sealed mode so you can still restore from this data if you require while the data ages out. Then when you reach the time that all restore points are now on the new Vault v2 repository, go ahead with cleaning up (deleting) the storage account from your Azure tenancy and removing the extent from your SOBR.
Option 2: Data Migration
For those with longer retention periods where the cost of retaining the Azure Blob account is not sustainable or pressing needs to transition, data must be actively migrated to Vault v2.
You can then follow the guide below! 👇
Data Migration to Veeam Data Cloud Vault v2
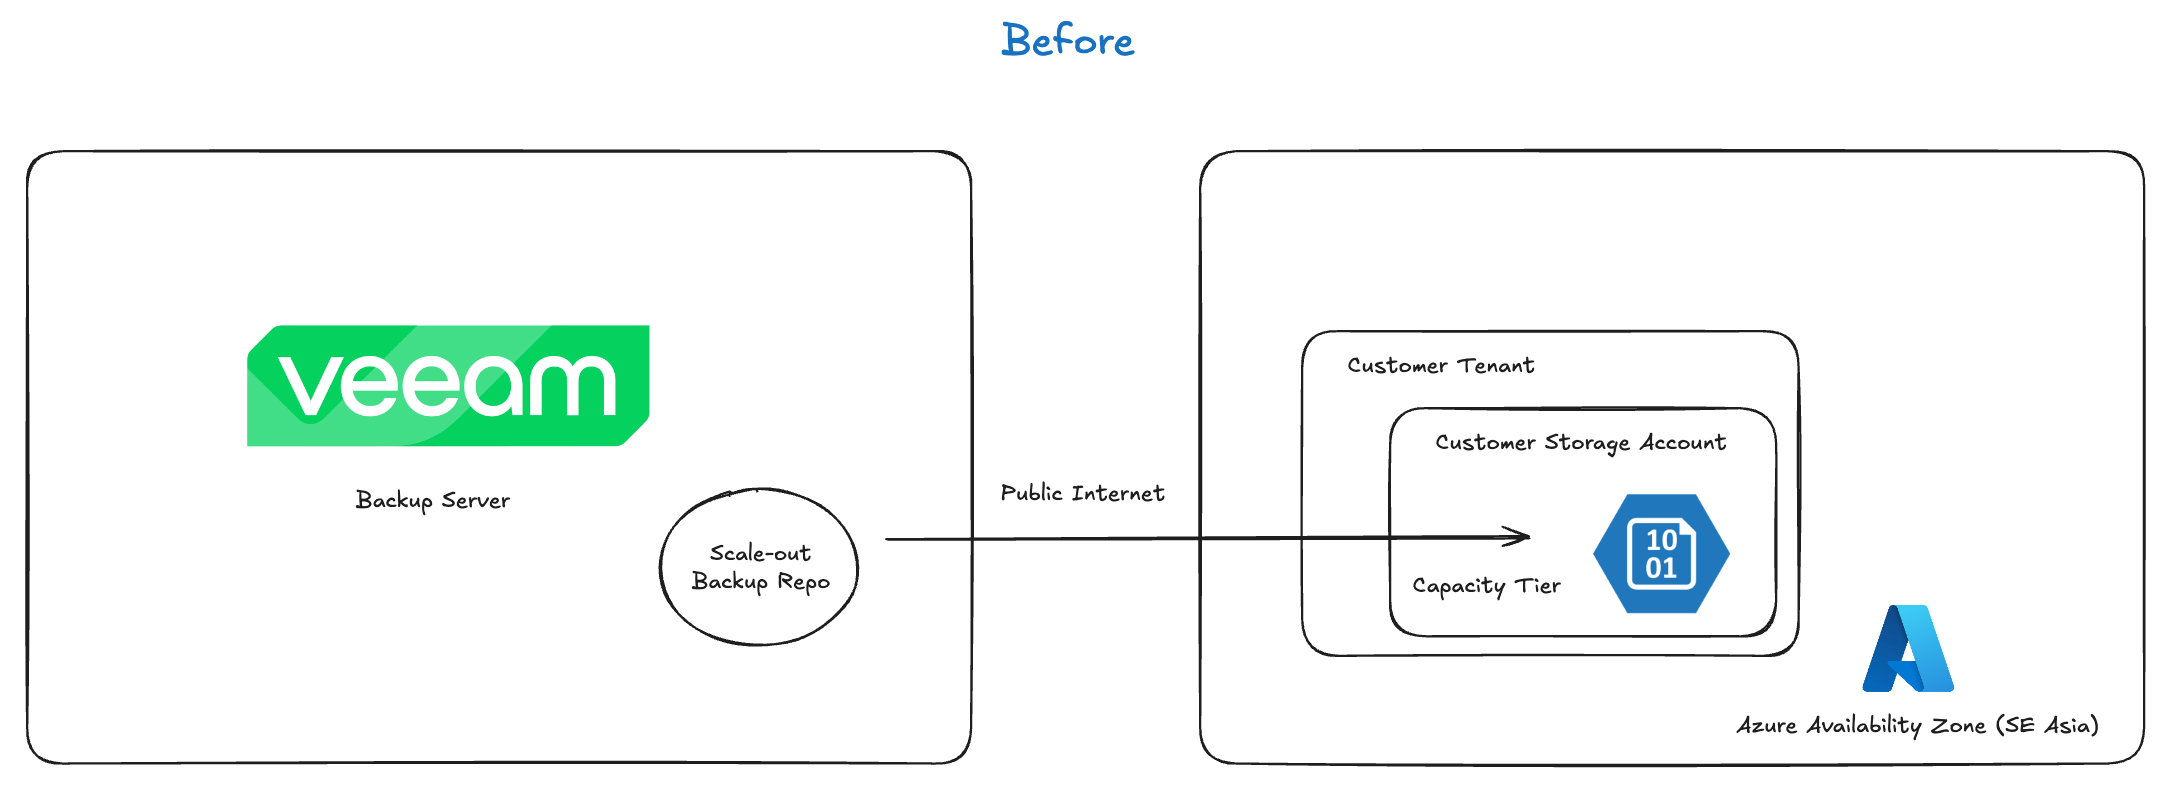
Taking a high-level look at my environment before we begin, you can see I have an on-premises backup server that connects over the internet to the public Azure Blob endpoints to place the capacity tier retention.
Prepare Infrastructure
For us to avoid those egress charges, and unnecessary download/re-upload of data to and from your backup environment over the internet we need to set up some temporary infrastructure within Azure to help facilitate this.
Fortigate Tunnel

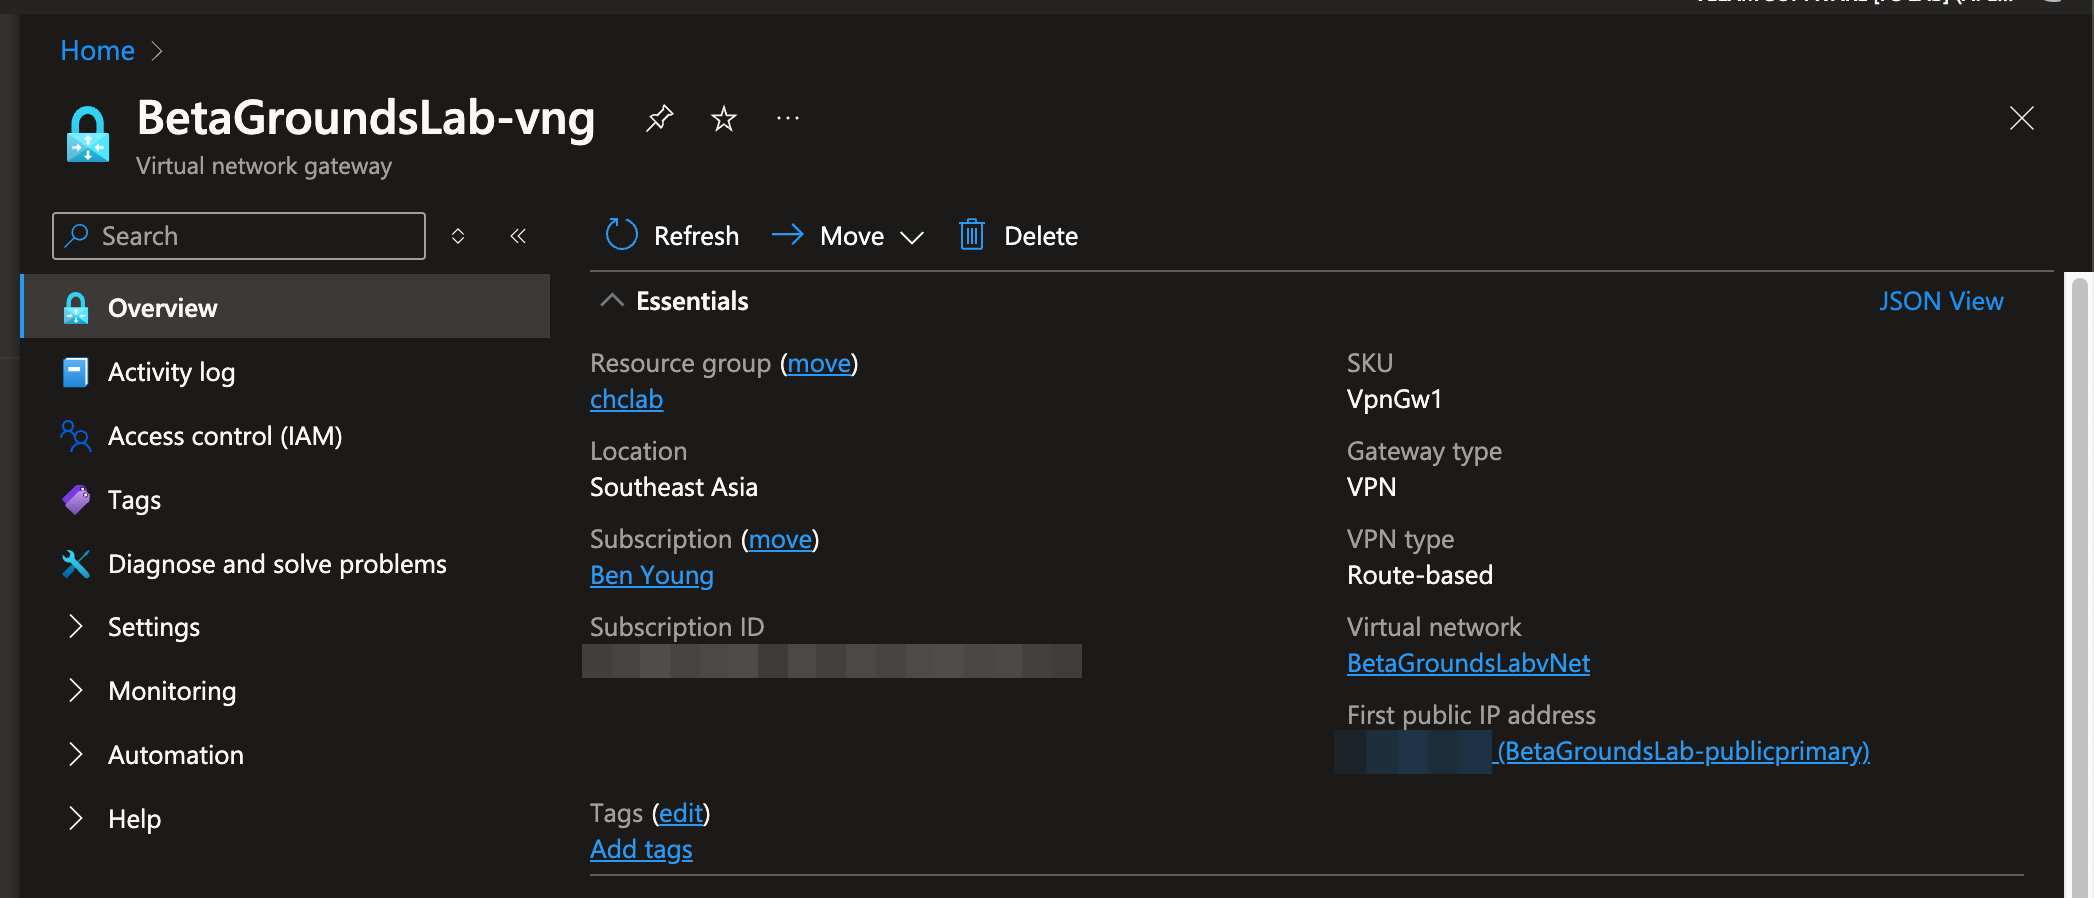
Virtual Network Gateway on Azure
Network Connectivity - Step 1
Set up a private IPsec tunnel (or equivalent private network) between your on-premises network and Azure. For this, I configured a tunnel between my Fortigate and an Azure Virtual Network Gateway (a small generation 1 to reduce cost).
As part of this setup, you will also configure an Azure Virtual Network to place your Virtual Machine into.
Virtual Machine Deployment - Step 2
Deploy a Windows Virtual Machine (VM) to act as our Veeam Gateway Server within Azure - depending on your data volume you will want to go for a machine with a larger number of CPU cores. For reference, I was able to get around 650mbps average on 2 CPU cores with this I assume is the limiting factor (they were maxed out) but I have not completed any exhaustive testing here.
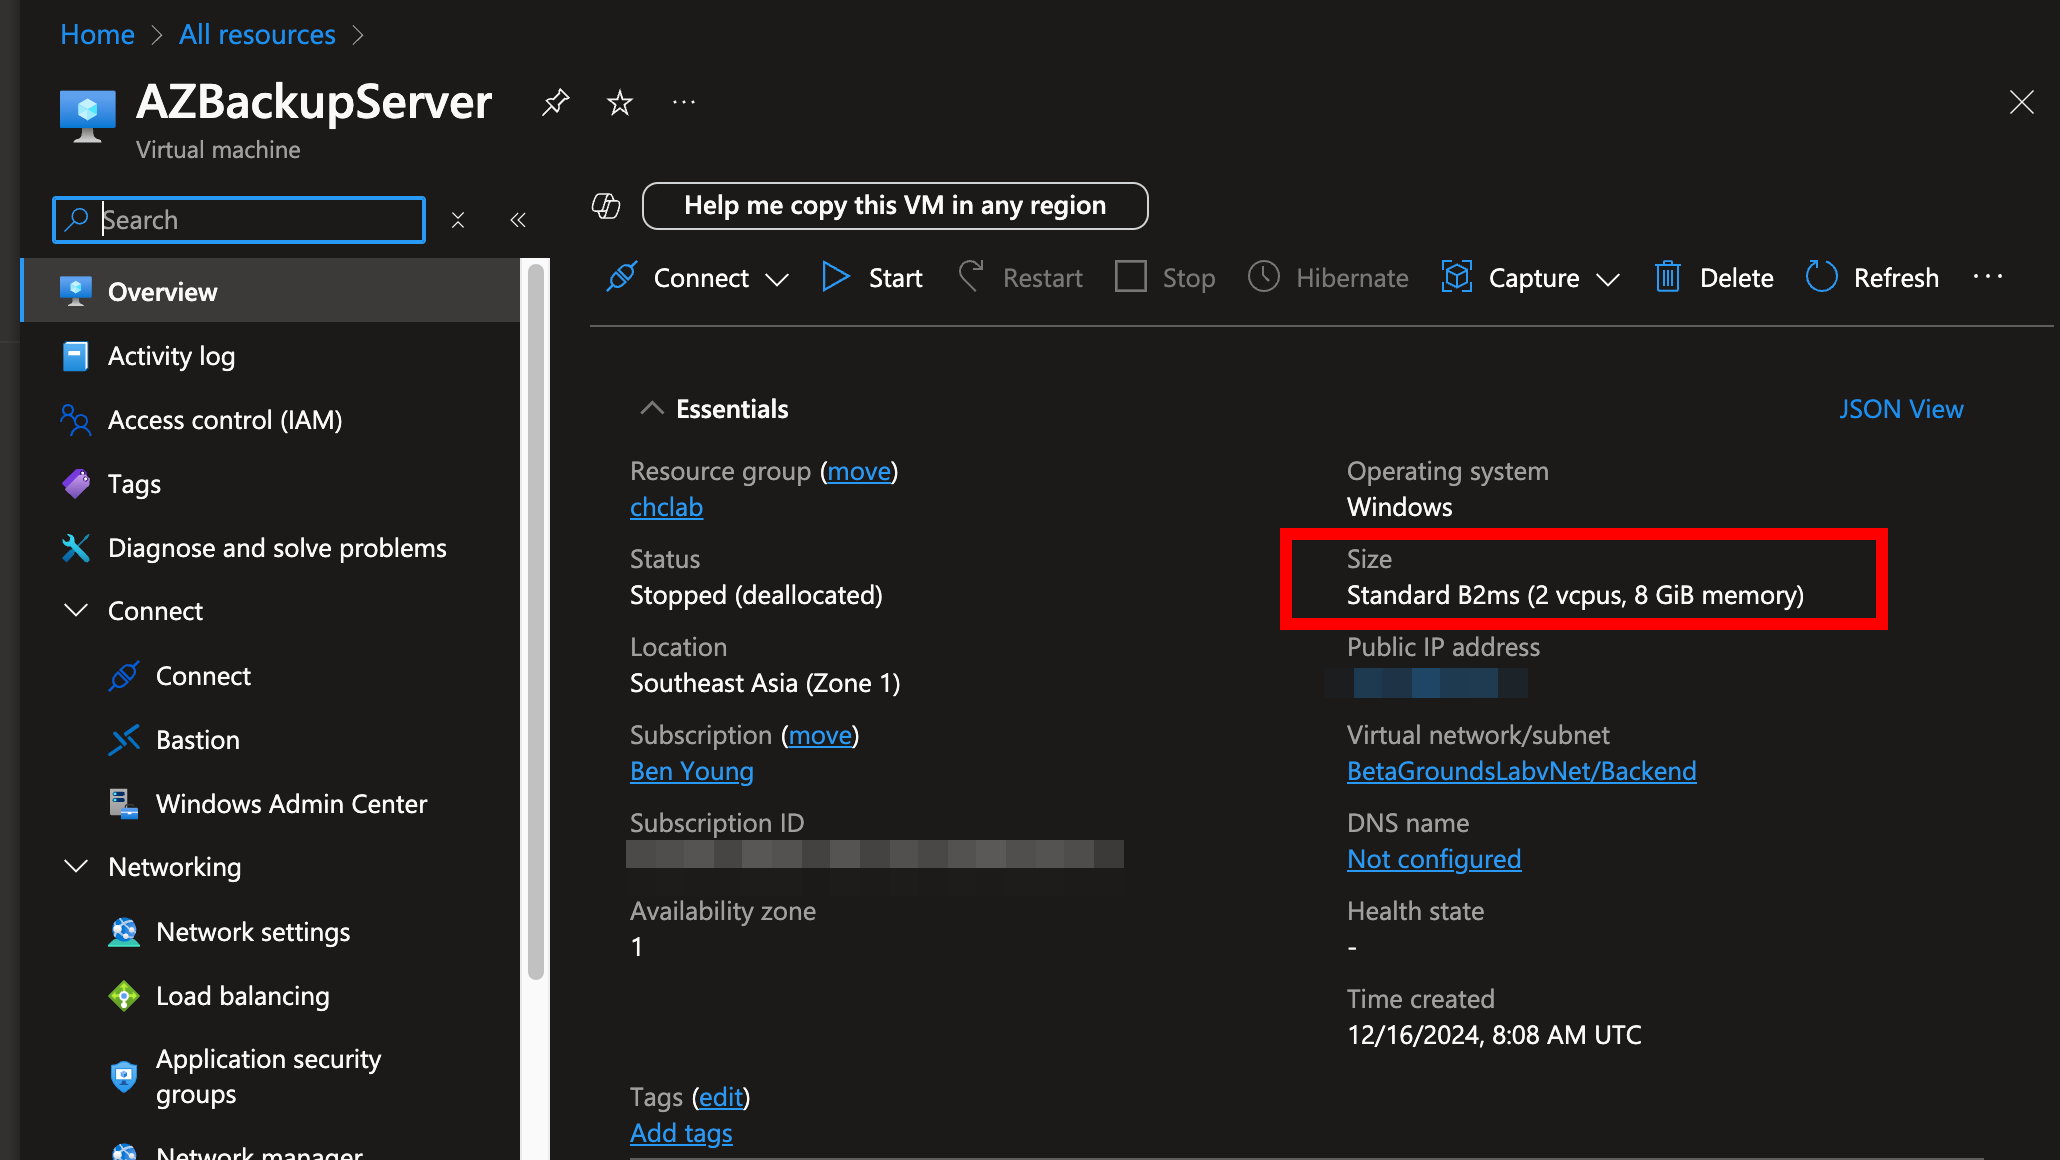
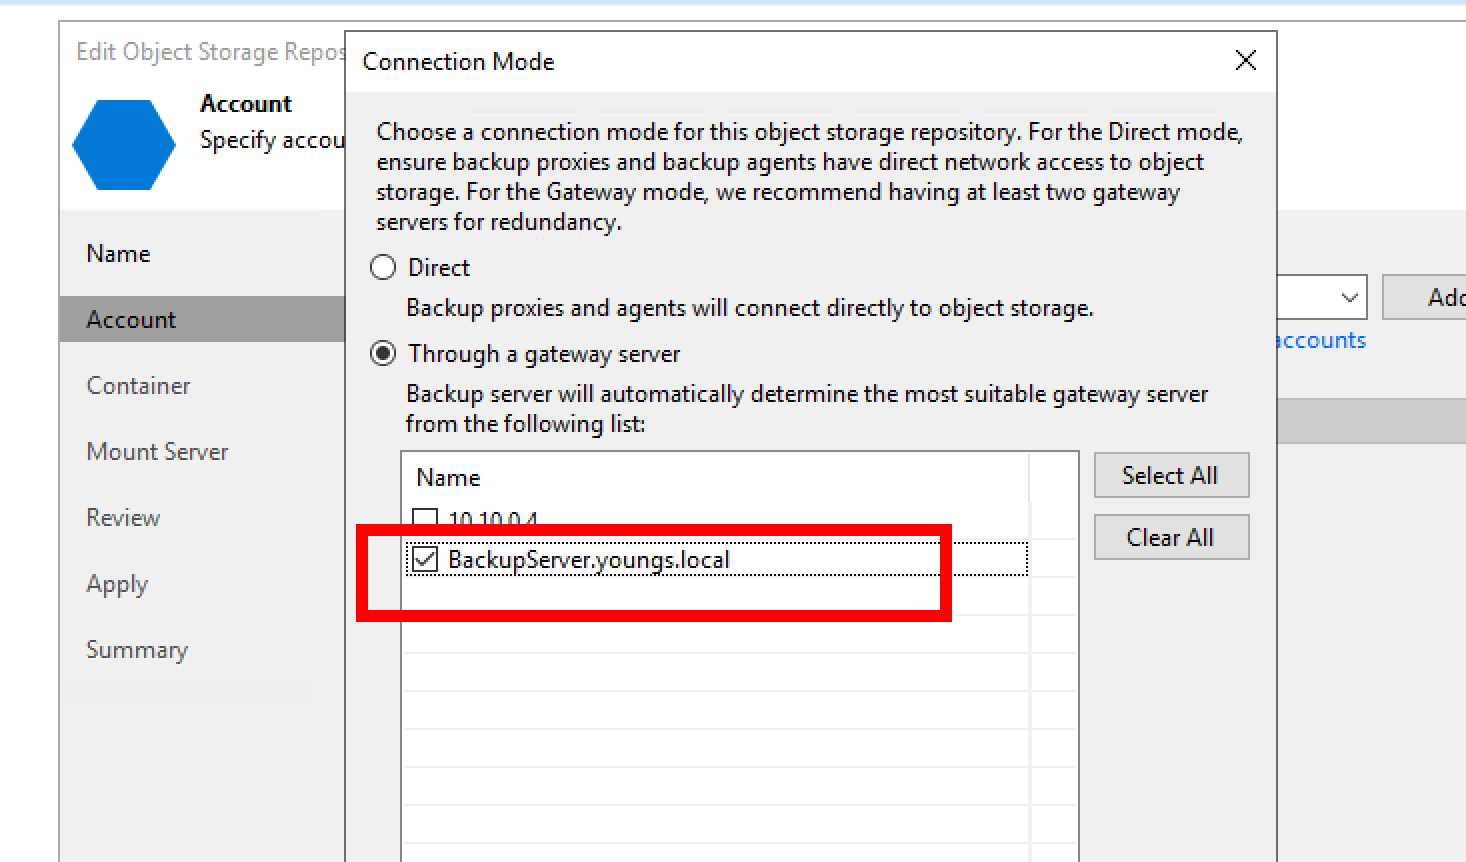
You can then find the private IP address within Azure console for this new VM and continue to add this server to your Veeam server.
Prepare Repositories - Step 3
Assuming you already have credentials for your new Vault v2 we can now add this as a backup repository. Normally we would add this as a Veeam Data Cloud Vault type, however, due to the evacuation step add this as an Azure Blob type.
Run through the add object storage wizard within Backup Repositories following the Object Storage > Hyperscalers > Microsoft Azure Storage > Azure Blob
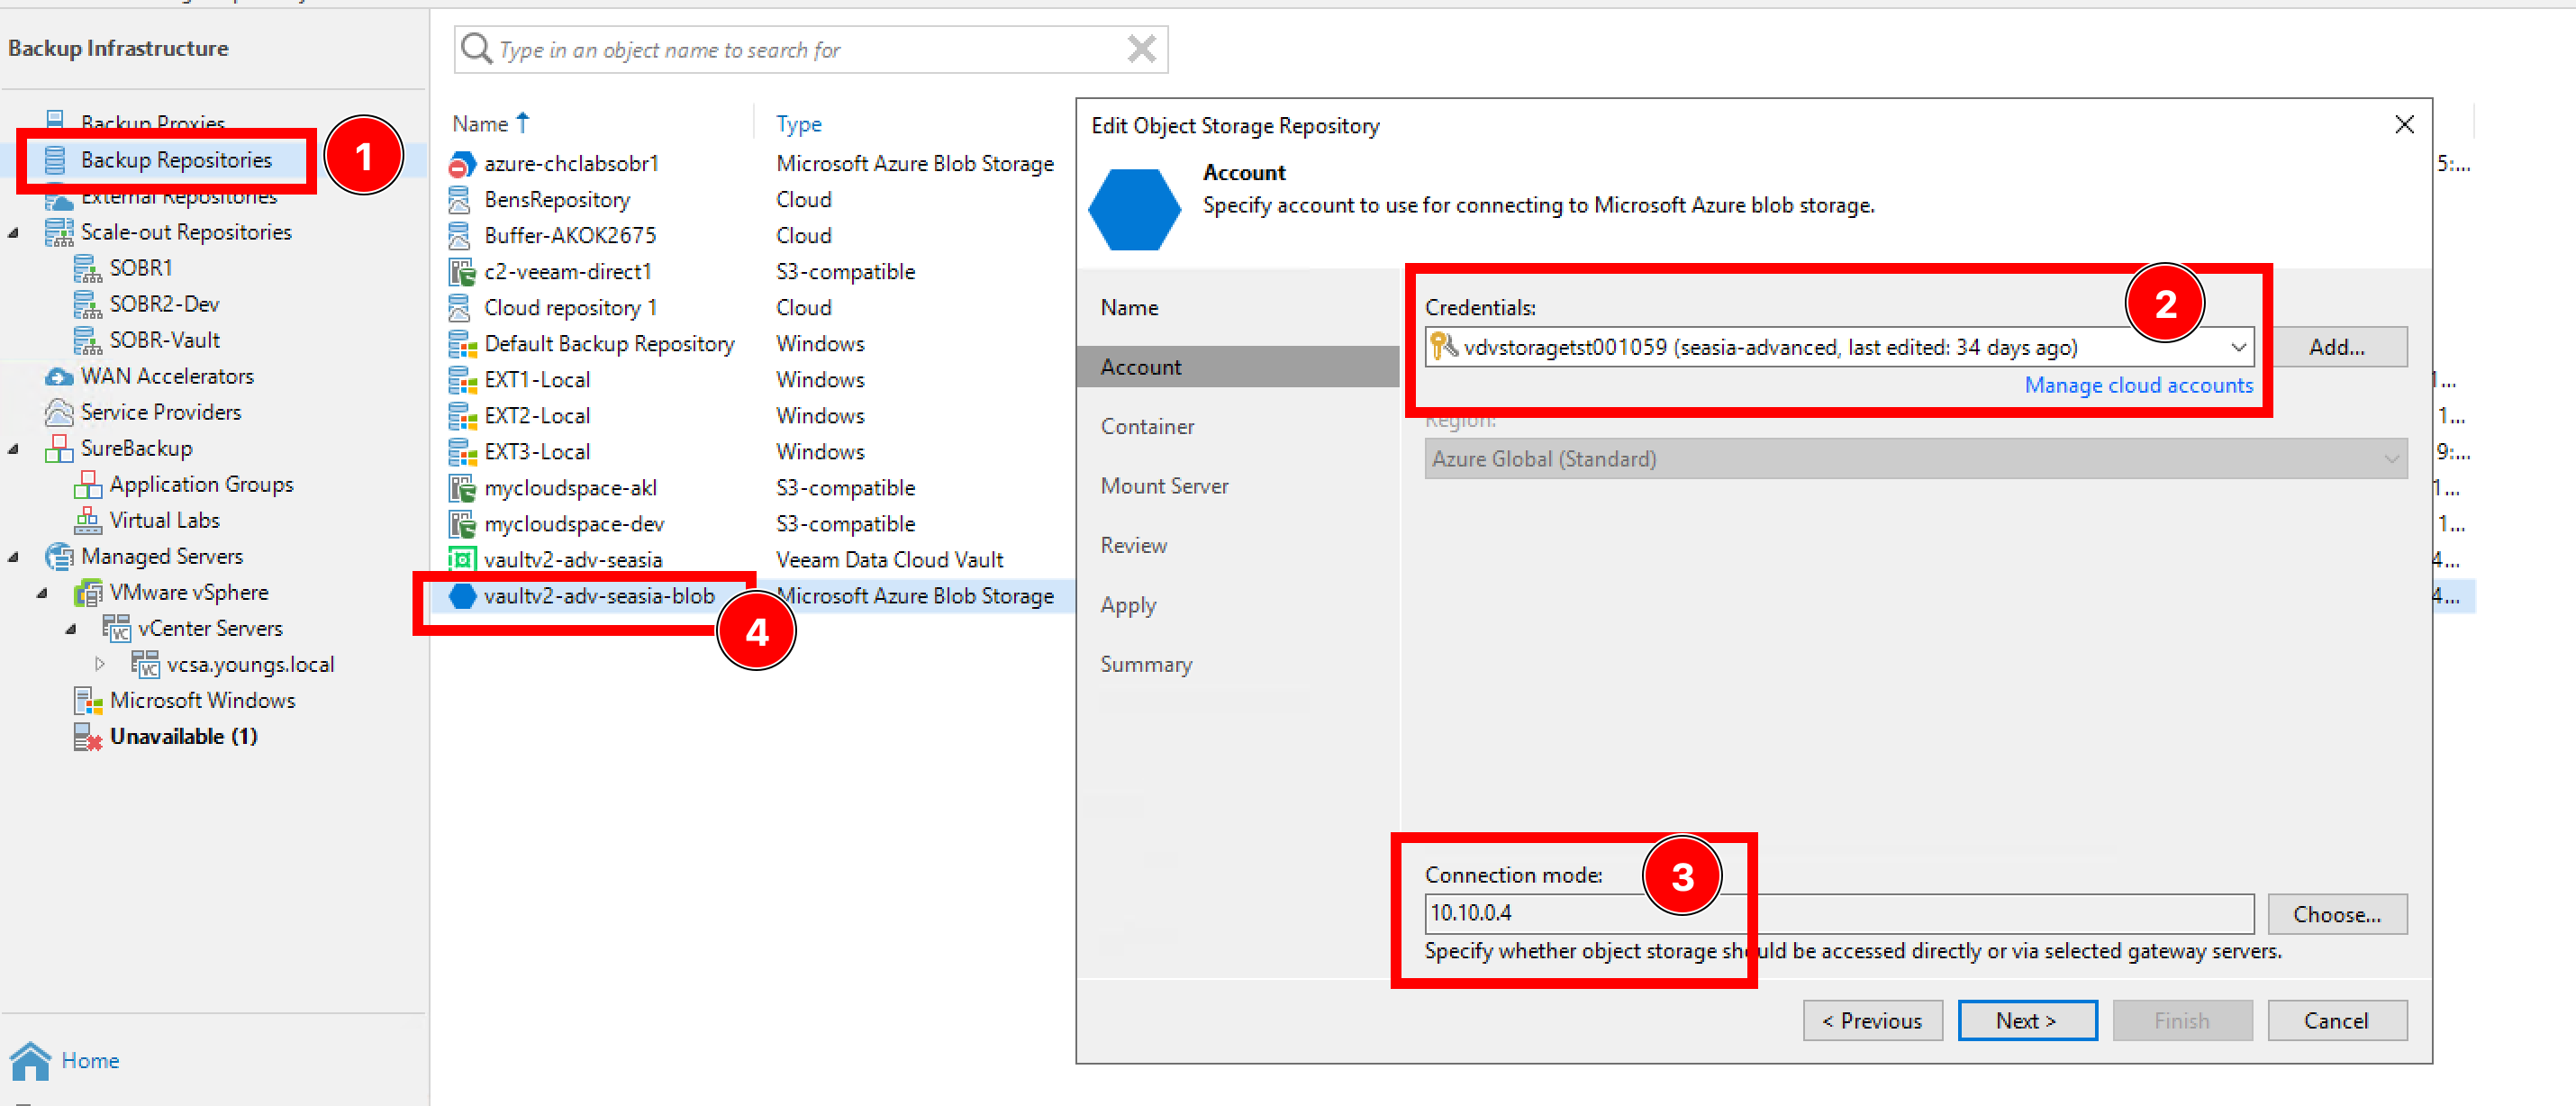
- Launch the add repository wizard.
- Add Vault v2 credentials from the Veeam Data Cloud dashboard when you add your Vault
- Select the Azure-hosted gateway server as the gateway for this repository.
- The name I have for my new repository is prefixed with vaultv2 so I can easily tell this is my Vault vs my normal Azure Blob
Migrating the Data
With the infrastructure now configured, we can begin to migrate the data. Taking a look at what our environment looks like during this phase you can see what we now have configured.

We need to perform some actions on the SOBR - the documentation for what we are performing including additional detail can be found here.
Enable Maintenance Mode:
Put the old Azure Blob extent into maintenance mode
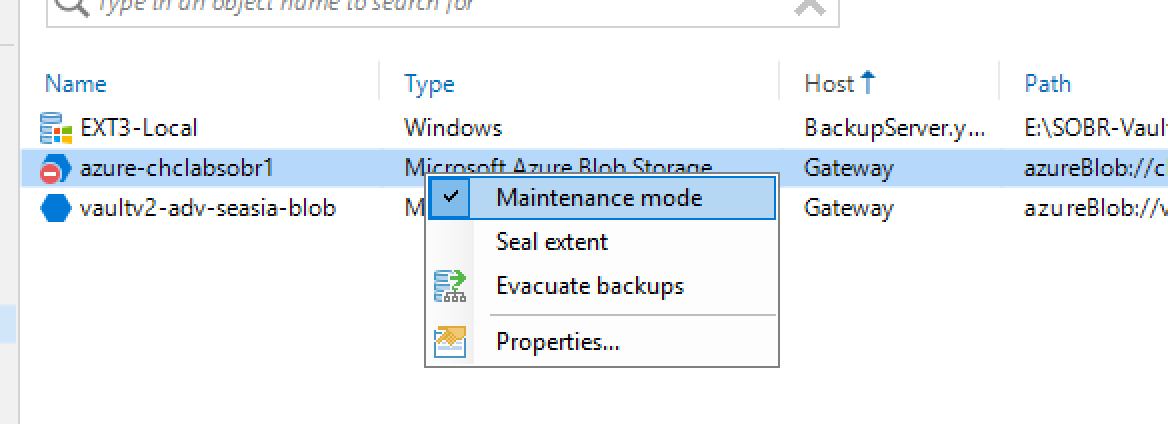
Evacuate Extent:
Initiate extent evacuation. This moves all data from the old extent to Vault v2 extent.

Monitor Progress:
To monitor backup evacuation in your system, open the History view, navigate to System in the inventory pane, select the relevant evacuation session, and then click ‘Statistics’ on the ribbon or right-click the session and select ‘Statistics’. This will provide you with information about the evacuation process.
You can also leverage tools like the Azure Monitor to track data movement. For large datasets, consider provisioning a higher-performance gateway server to accelerate the transfer.
You can see during the migration on the Azure hosted virtual machine now that all the traffic is staying within Azure
Azure Virtual Machine Adapters
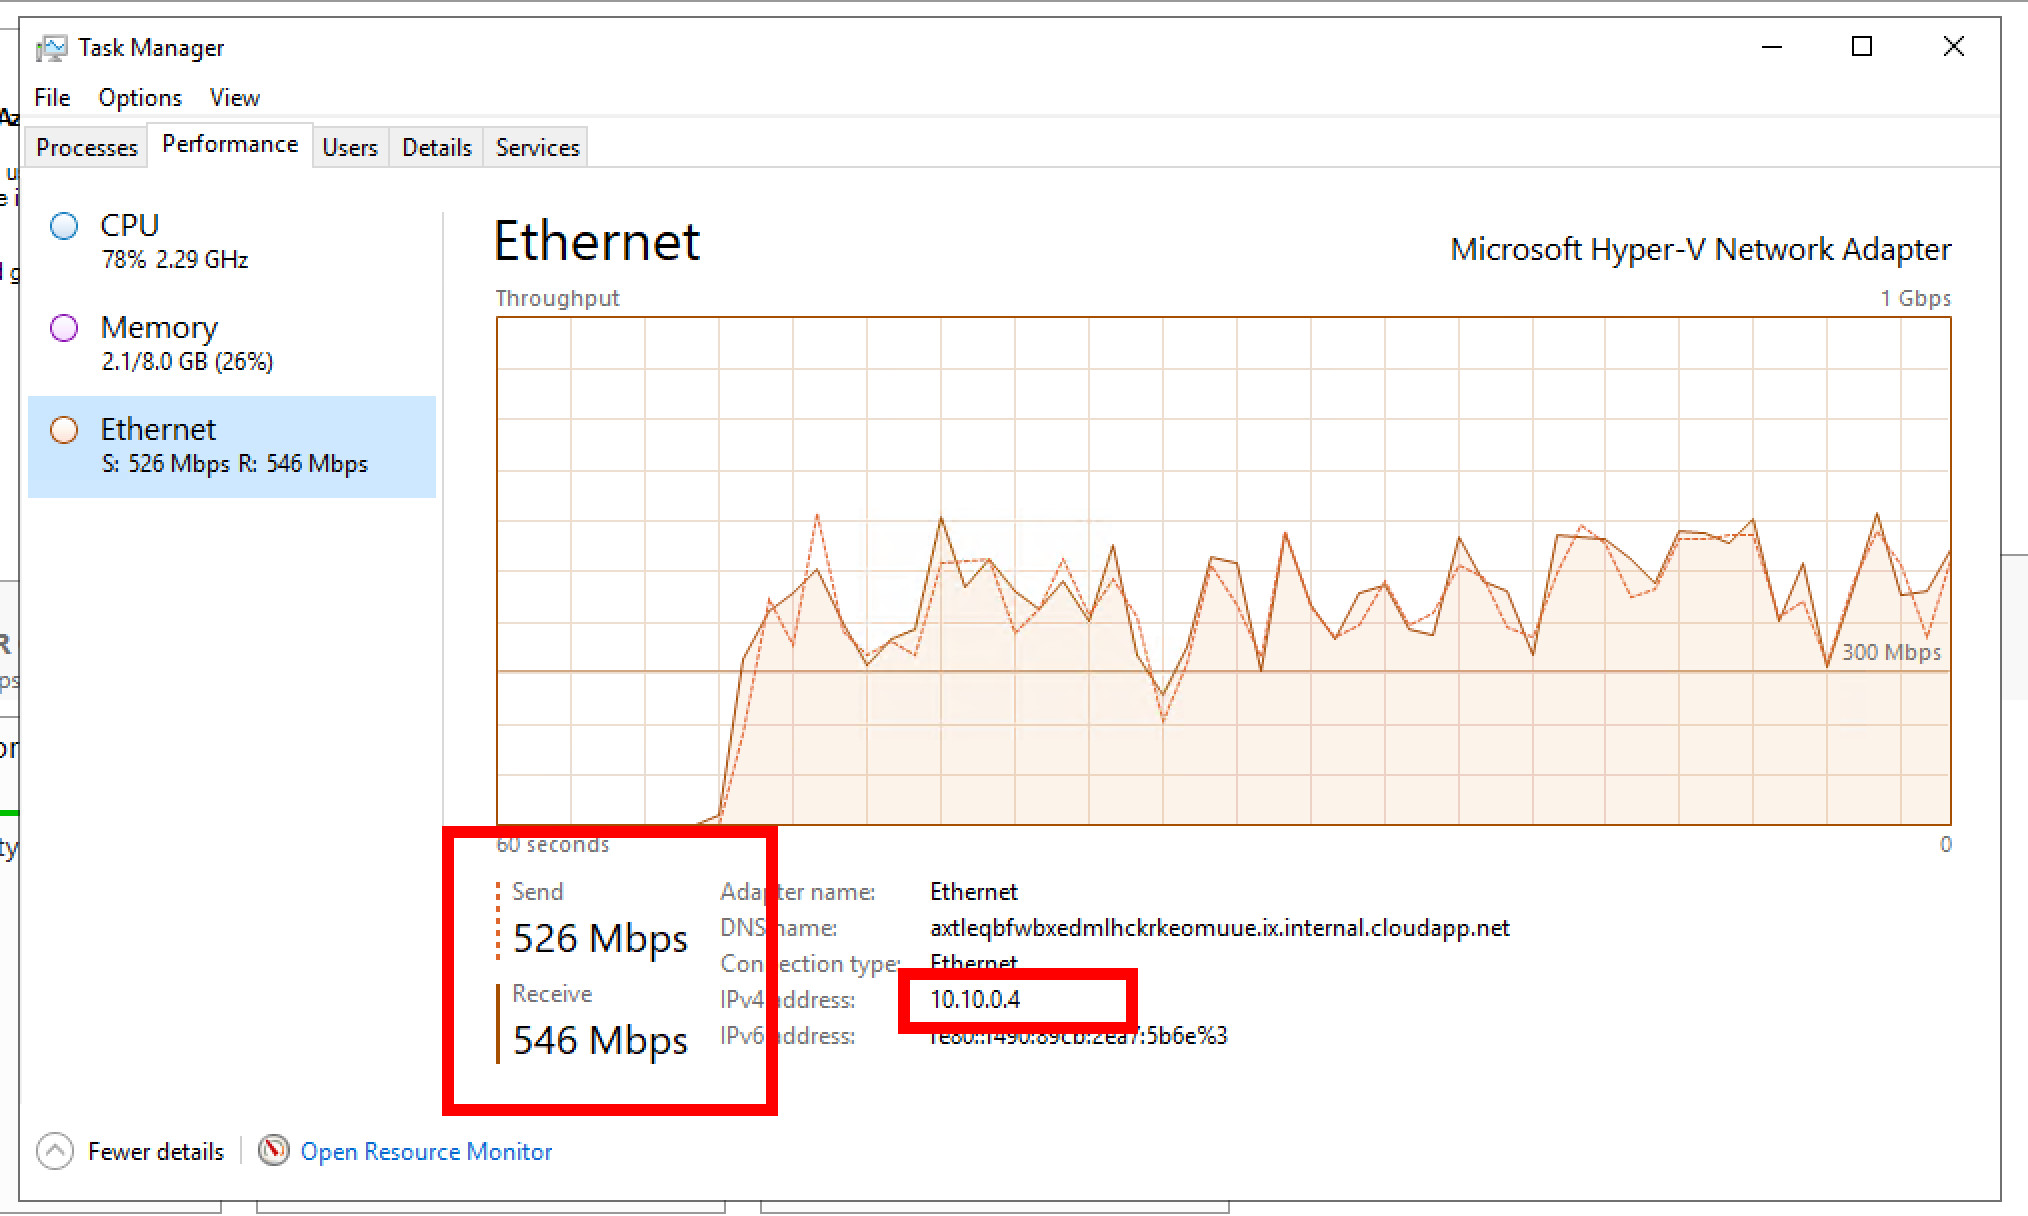
IPSEC Tunnel Traffic (No Traffic!)

After the Migration
Verify the Transition:
Confirm that data in the capacity tier is now stored in Vault v2 by checking backup job configurations and repository statuses.
Retention points are now located in Vault v2

Decommission Old Infrastructure:
Remove temporary components, including the IPsec tunnel, gateway server, and Azure Blob storage account.
Optimize Configurations:
With the Azure assets cleaned up and the Veeam Backup and Replication environment set back to direct your environment will now be configured like this - very similar to where we started except now all of your retention points now reside in Vault v2!
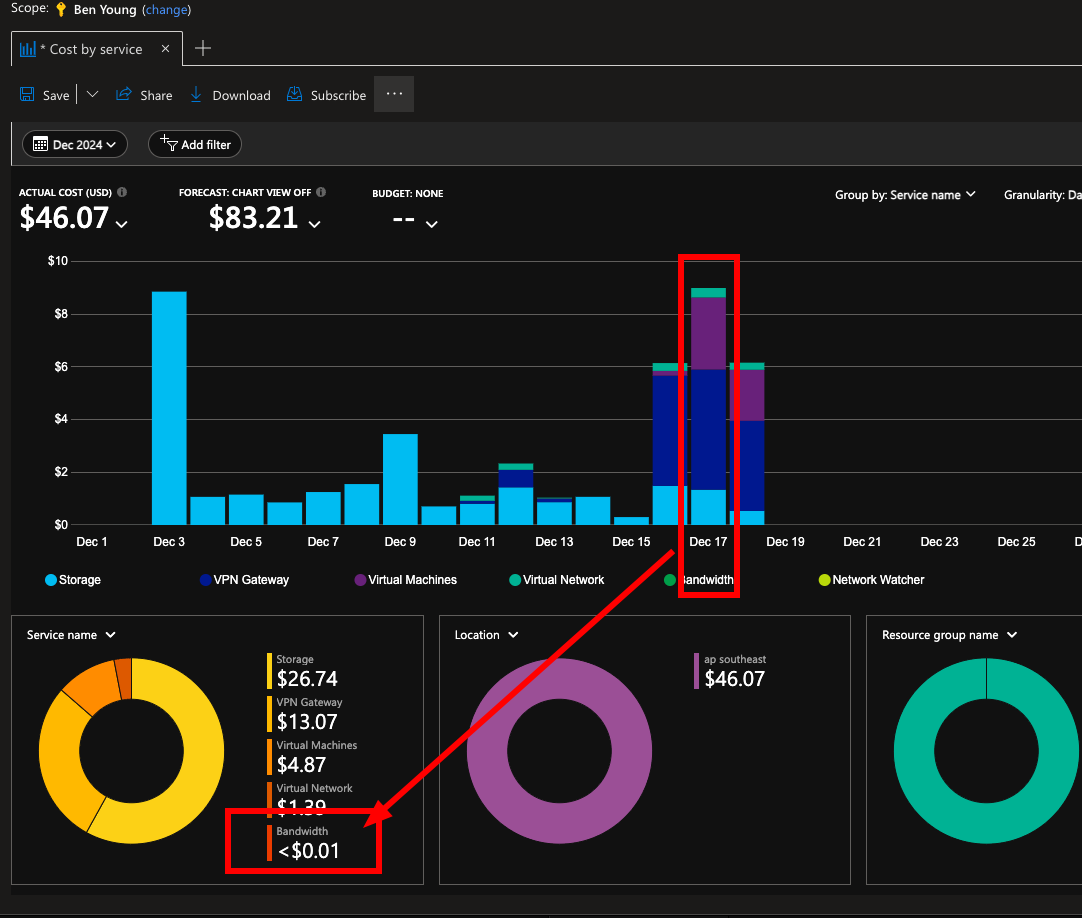
You can see the cost for me was very little, with no bandwidth and a small amount of infrastructure costs for private connectivity and the gateway server.
Summary and Best Practices
Migrating to Veeam Vault v2 is a strategic move to consolidate and optimize your backup infrastructure. By leveraging IPsec tunnels and gateway servers, you can eliminate egress fees (when in the same region) while ensuring a smooth data transition. Here are some final tips for success:
- Start Small: Test the migration process with a limited dataset before scaling up.
- Monitor Resources: Use appropriately sized virtual machines to handle the migration workload efficiently.
- Document the Process: Keep a detailed record of configurations and actions for future reference.
With these steps and considerations, your organization can confidently move to Veeam Vault v2, unlocking new efficiencies and capabilities for your backup and recovery strategy.
