
Instant Disk Recovery in Veeam v10

Working for a service provider we deal with a lot of restoration requests from our clients. Up until now, we have been using a combination of methods to get our clients data securely back to them in the fastest way possible.
The most common method we use is the Instant Recovery feature which allows the Veeam Backup server to present the backed up virtual machine to the ESXi hosts.
We then give them two options;
- The client can use our portal to access the virtual machine console, add a new disk to the instant recovery machine and copy data they want to recover. Once complete, we move the temporary disk to a running production machine for them to copy the data off before destroying this disk and the instant recovery
- We simply detach the desired drive from the instant recovery to a running production machine. They copy the data and when complete we tear everything down cleanly
This works great although I would LOVE an API we could him via Enterprise manager to automate the instant recovery side of things.
Introducing Instant Disk Recovery
With this new feature, we can now simply instantly recover disk(s) from a backup directly to a running machine - the original or another machine.
Here is a quick demo of a single disk being presented to another virtual machine here in my lab.
Walkthrough
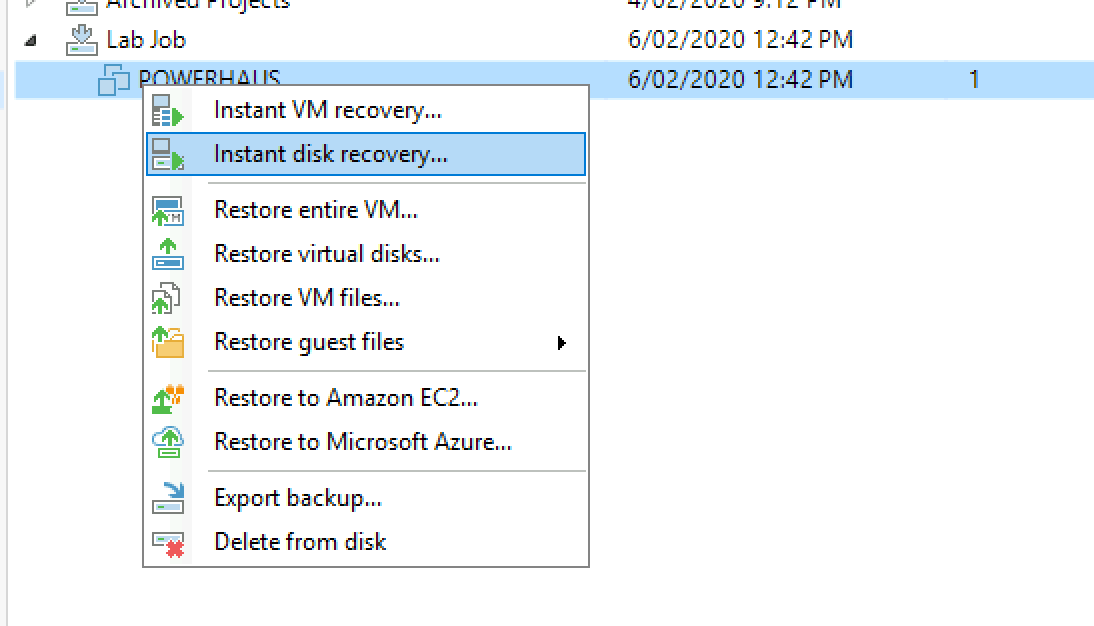
Find the backup, right click hit Instant Disk Recovery
Select the desired restore point

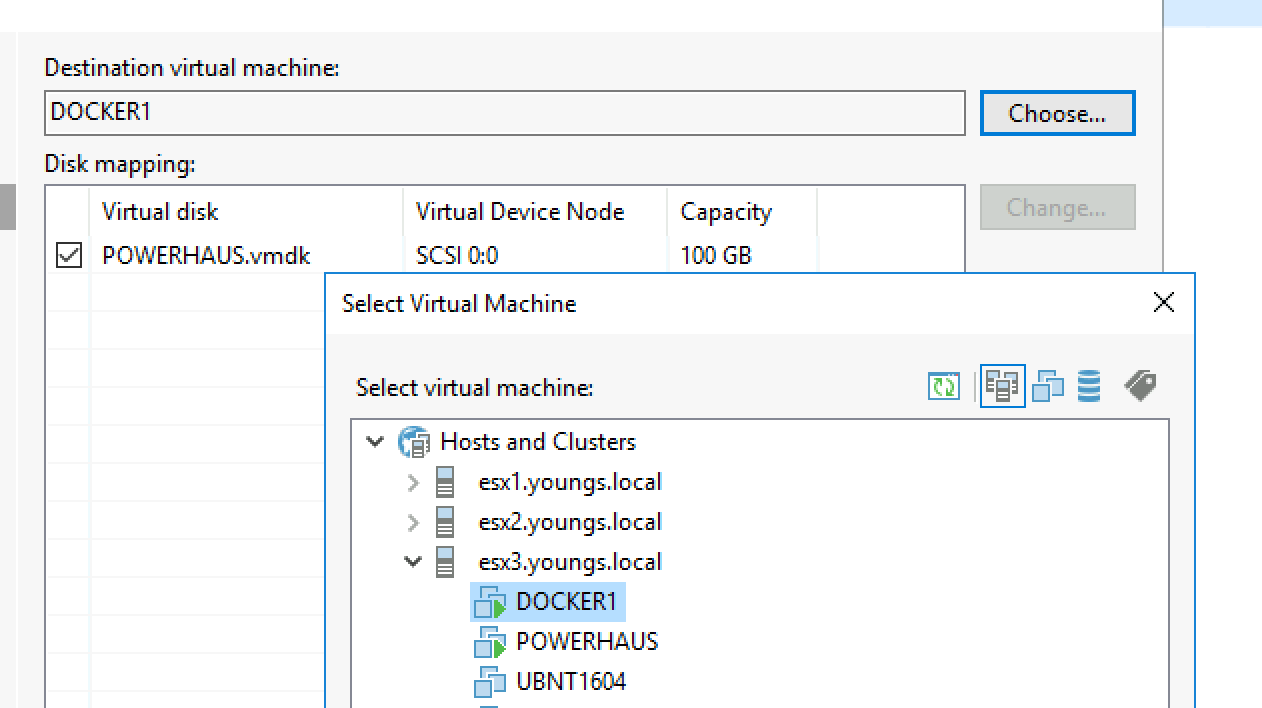
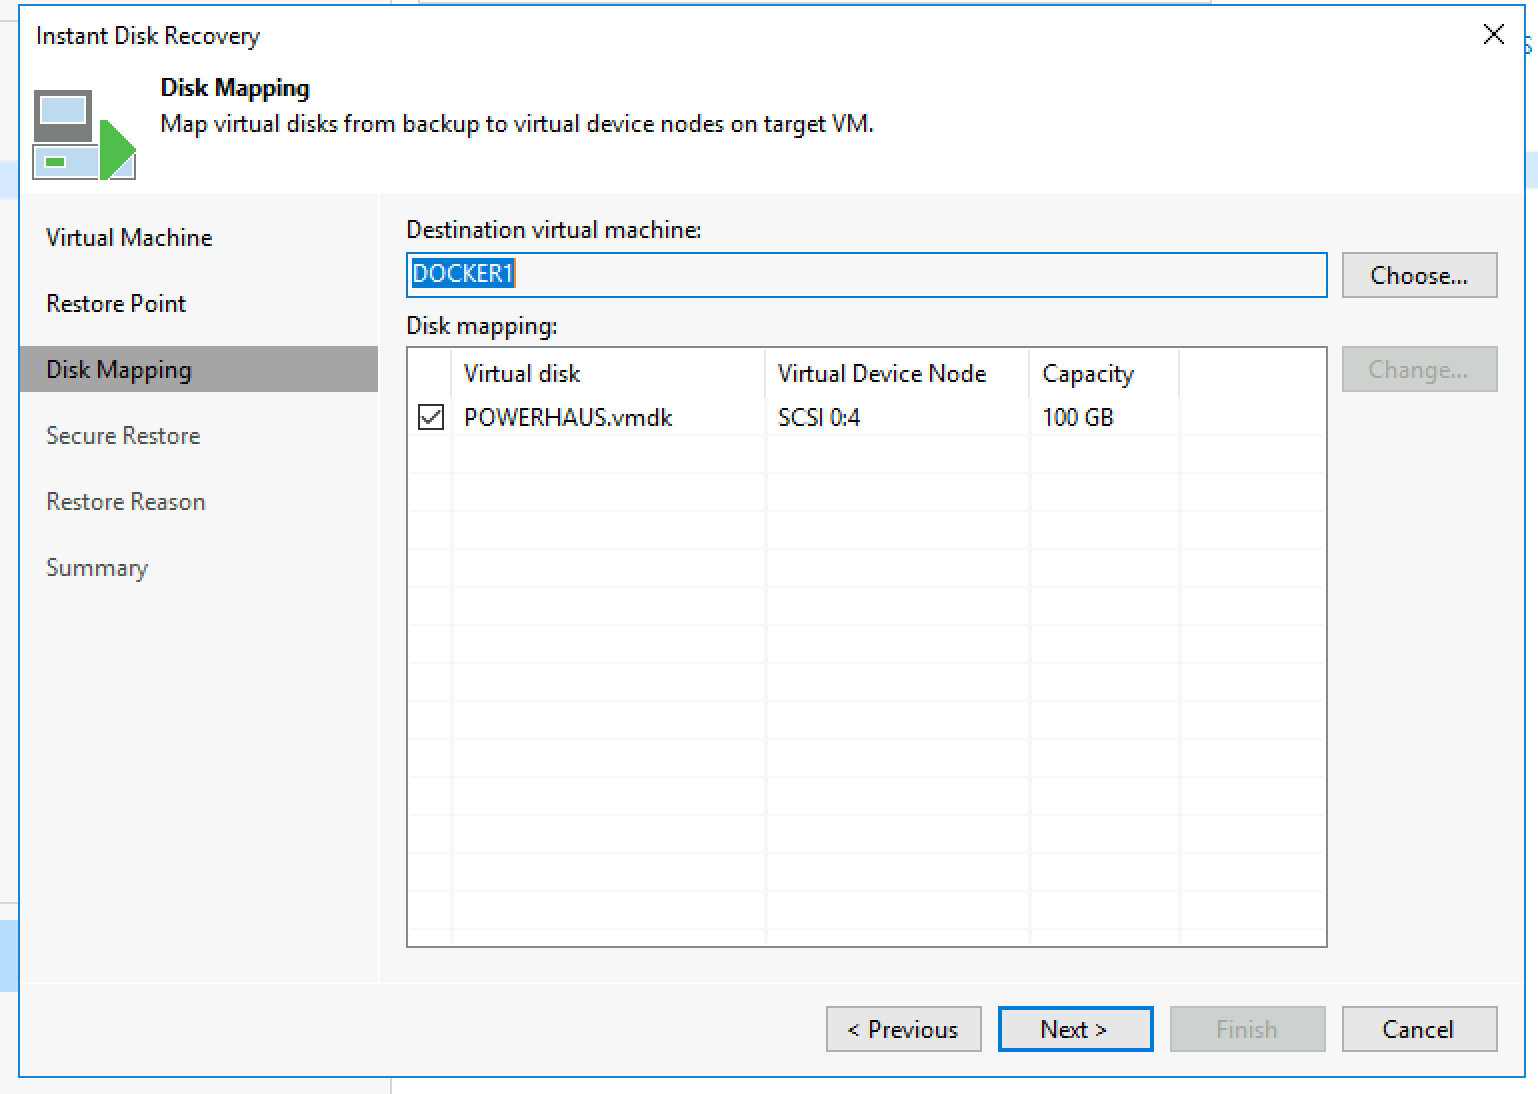
Choose the destination machine (it can be the original or a different one)
Now, take note of the Virtual Device Node - you are going to want to ensure that you do not replace an existing disk on the destination machine that has the same node ID.
Thankfully, Veeam has all the info at hand. Select each disk, and click change. Notice below the warning around existing disk will be replaced.
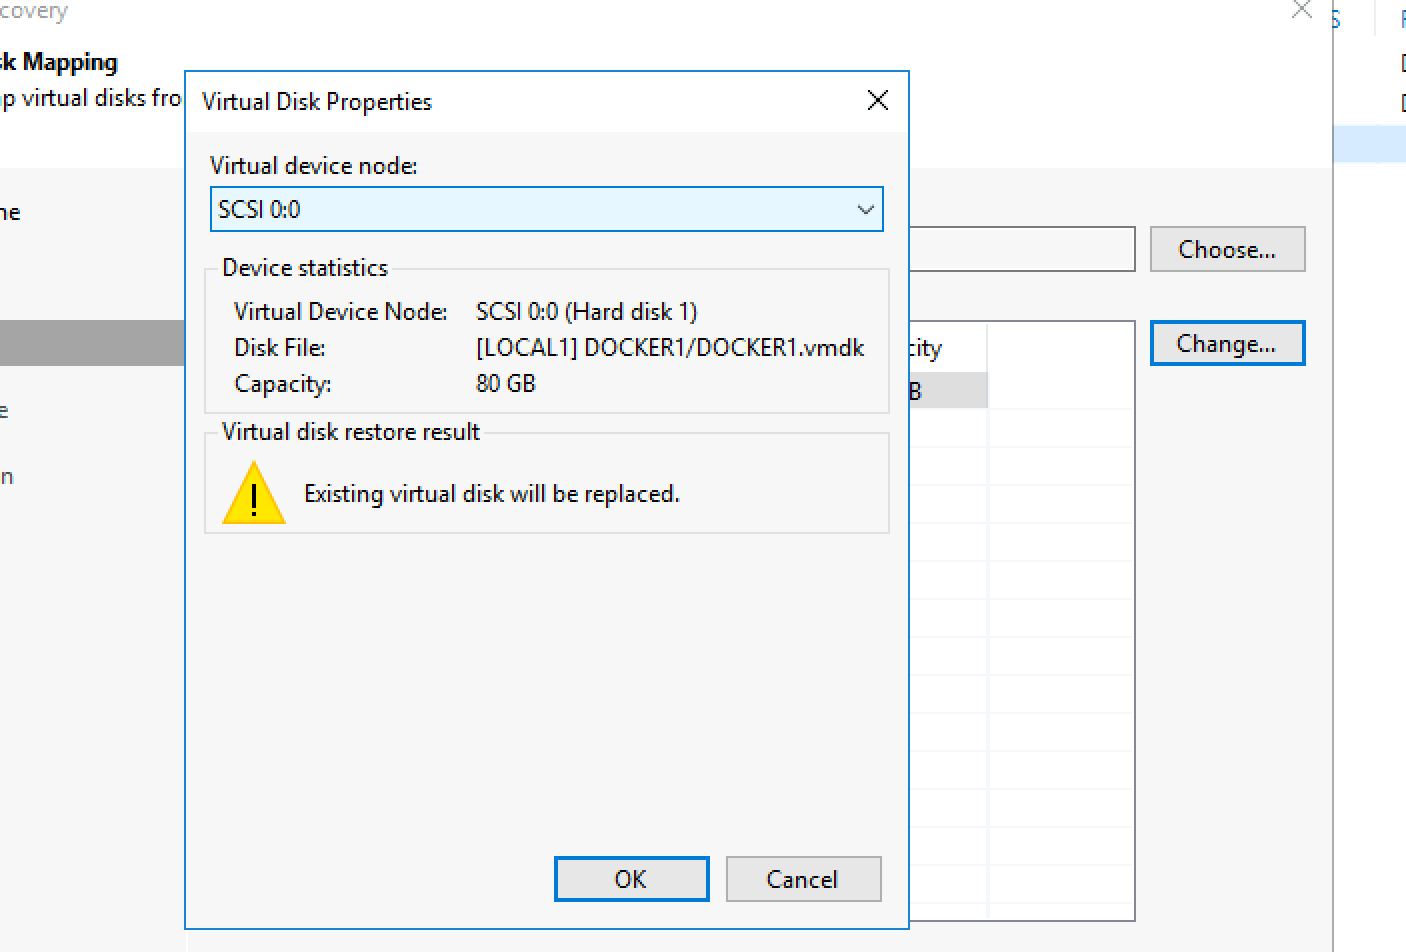
Simply change the node ID to another that is not already in use at the destination and it will all check out

Confirm your disk mapping
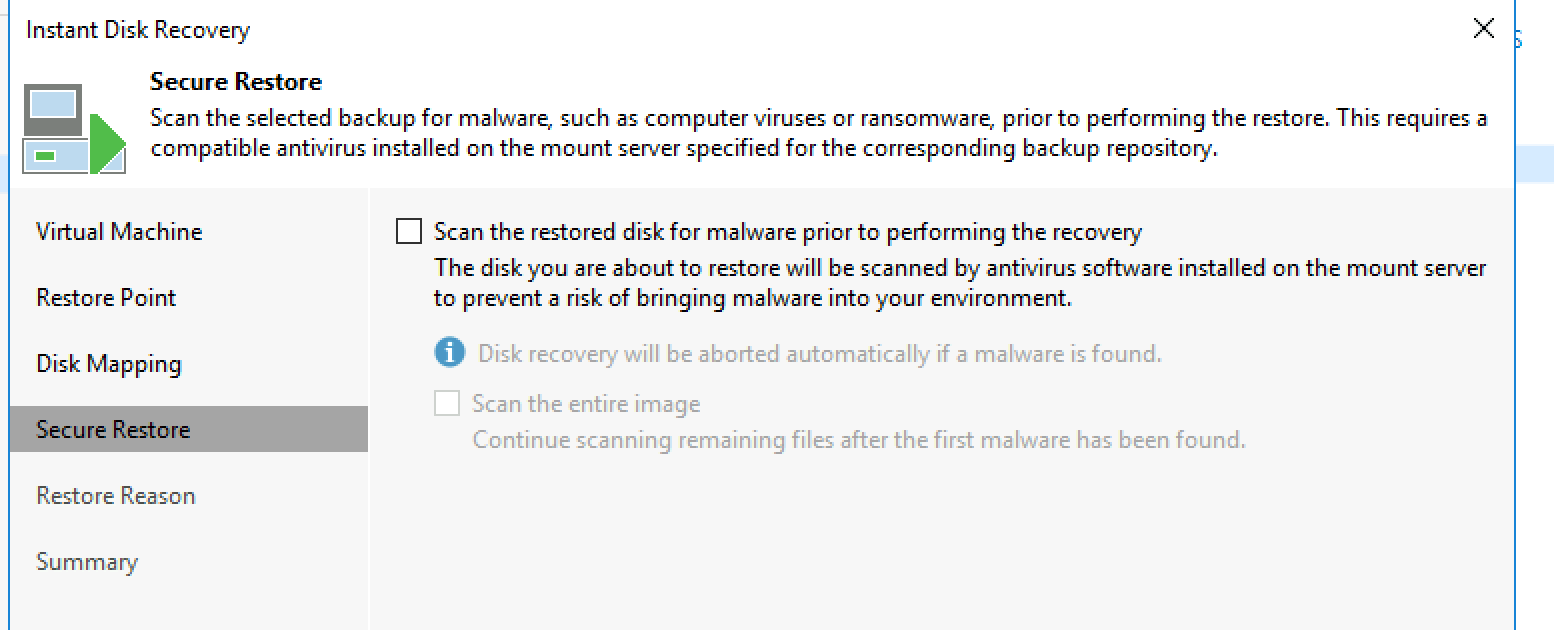
The next screen has a neat little guest feature around what should happen when this disk is attached and if it should be scanned for malware etc, confirm what you want to do.
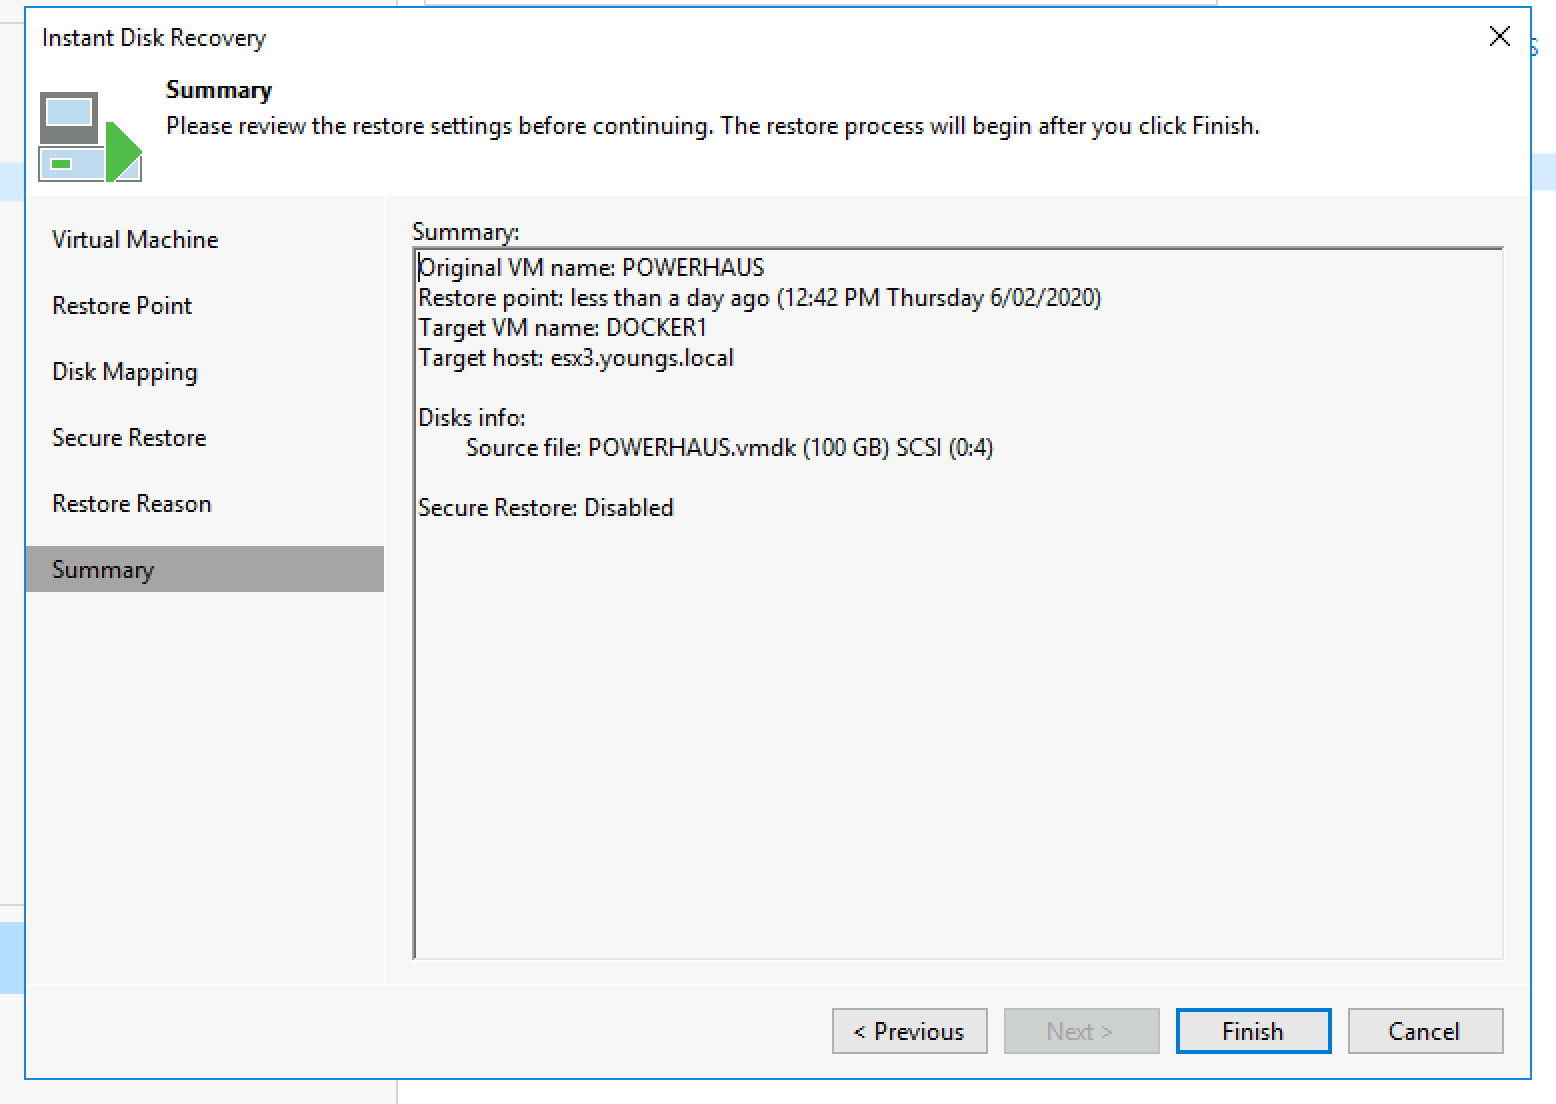
Now confirm your recovery options
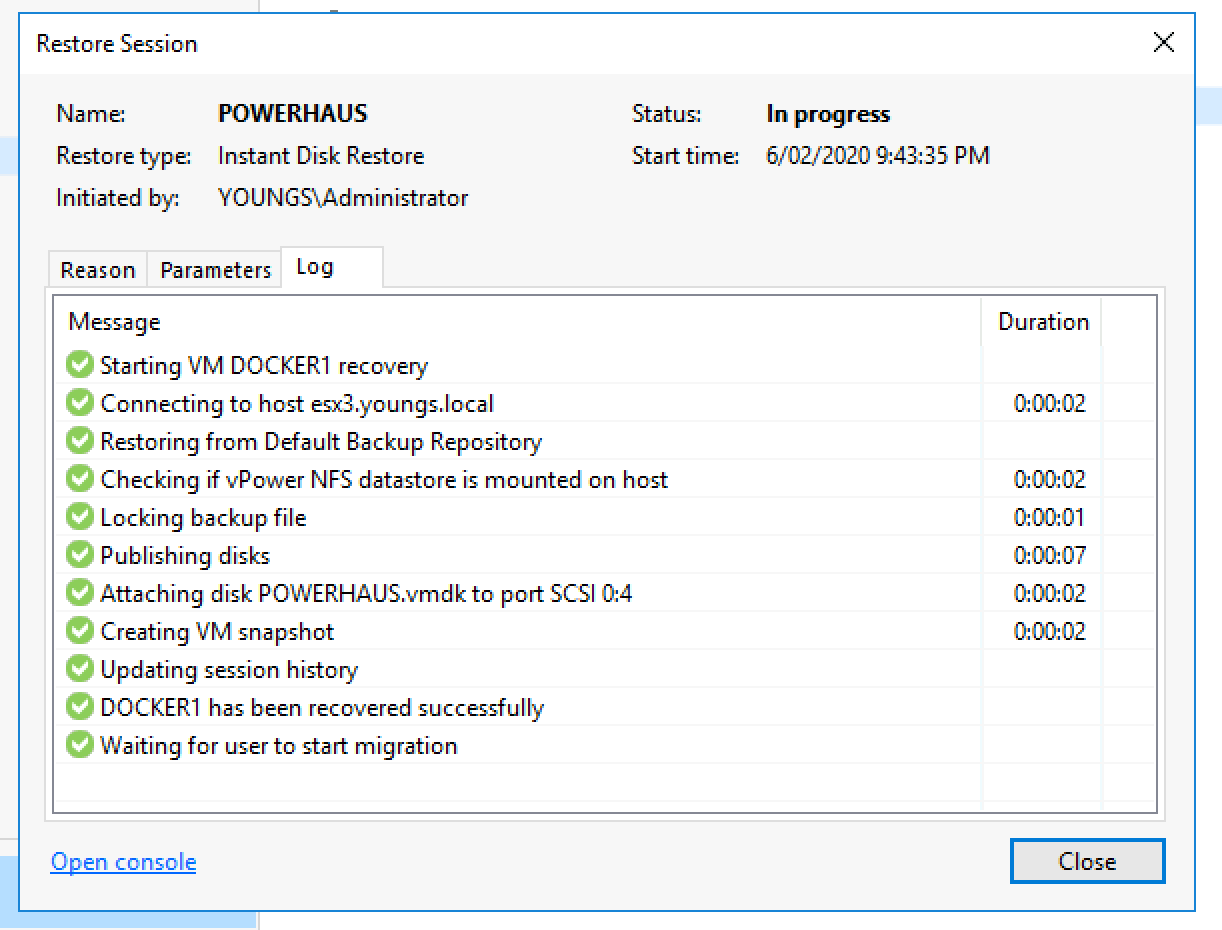
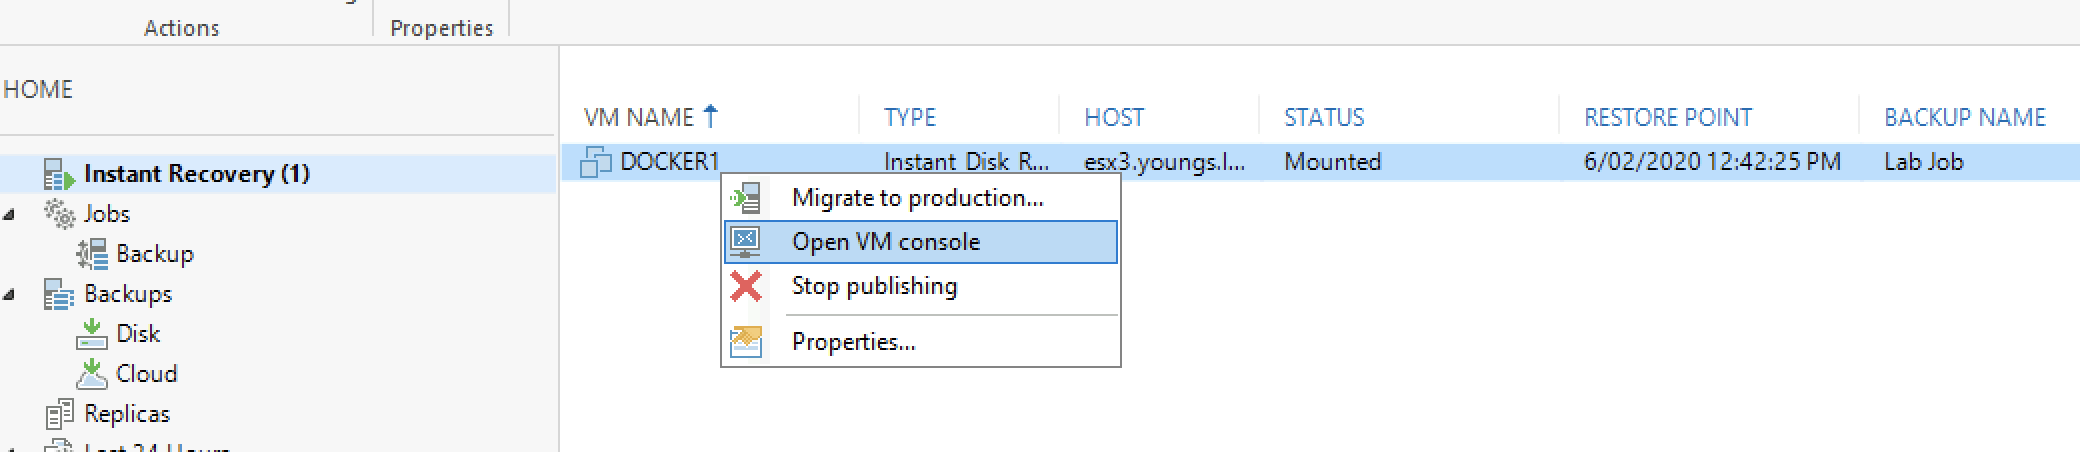
Let it play out, and once it has contacted the virtual environment and attached the disks you should see a summary like the below. Also, you will see an instant recovery node on the Veeam menu.
On the virtual environment, you can see an NFS datastore has been added

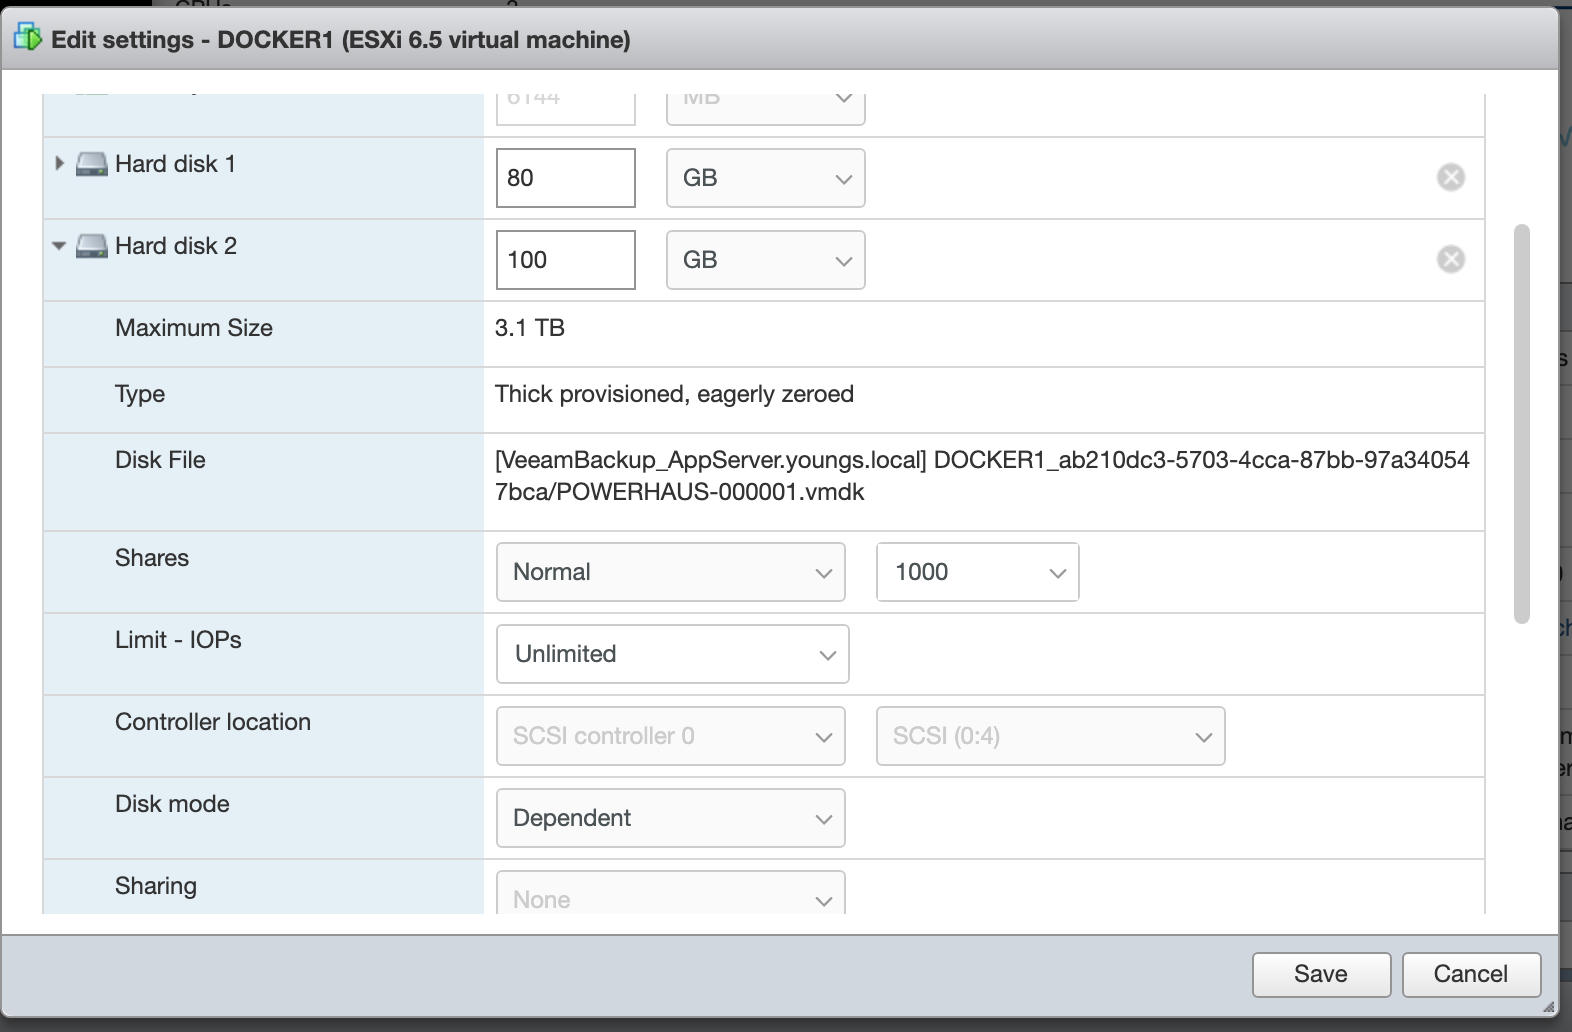
And on the virtual machine, you can see that the virtual disk has now been attached (Hard Disk 2 for me below)
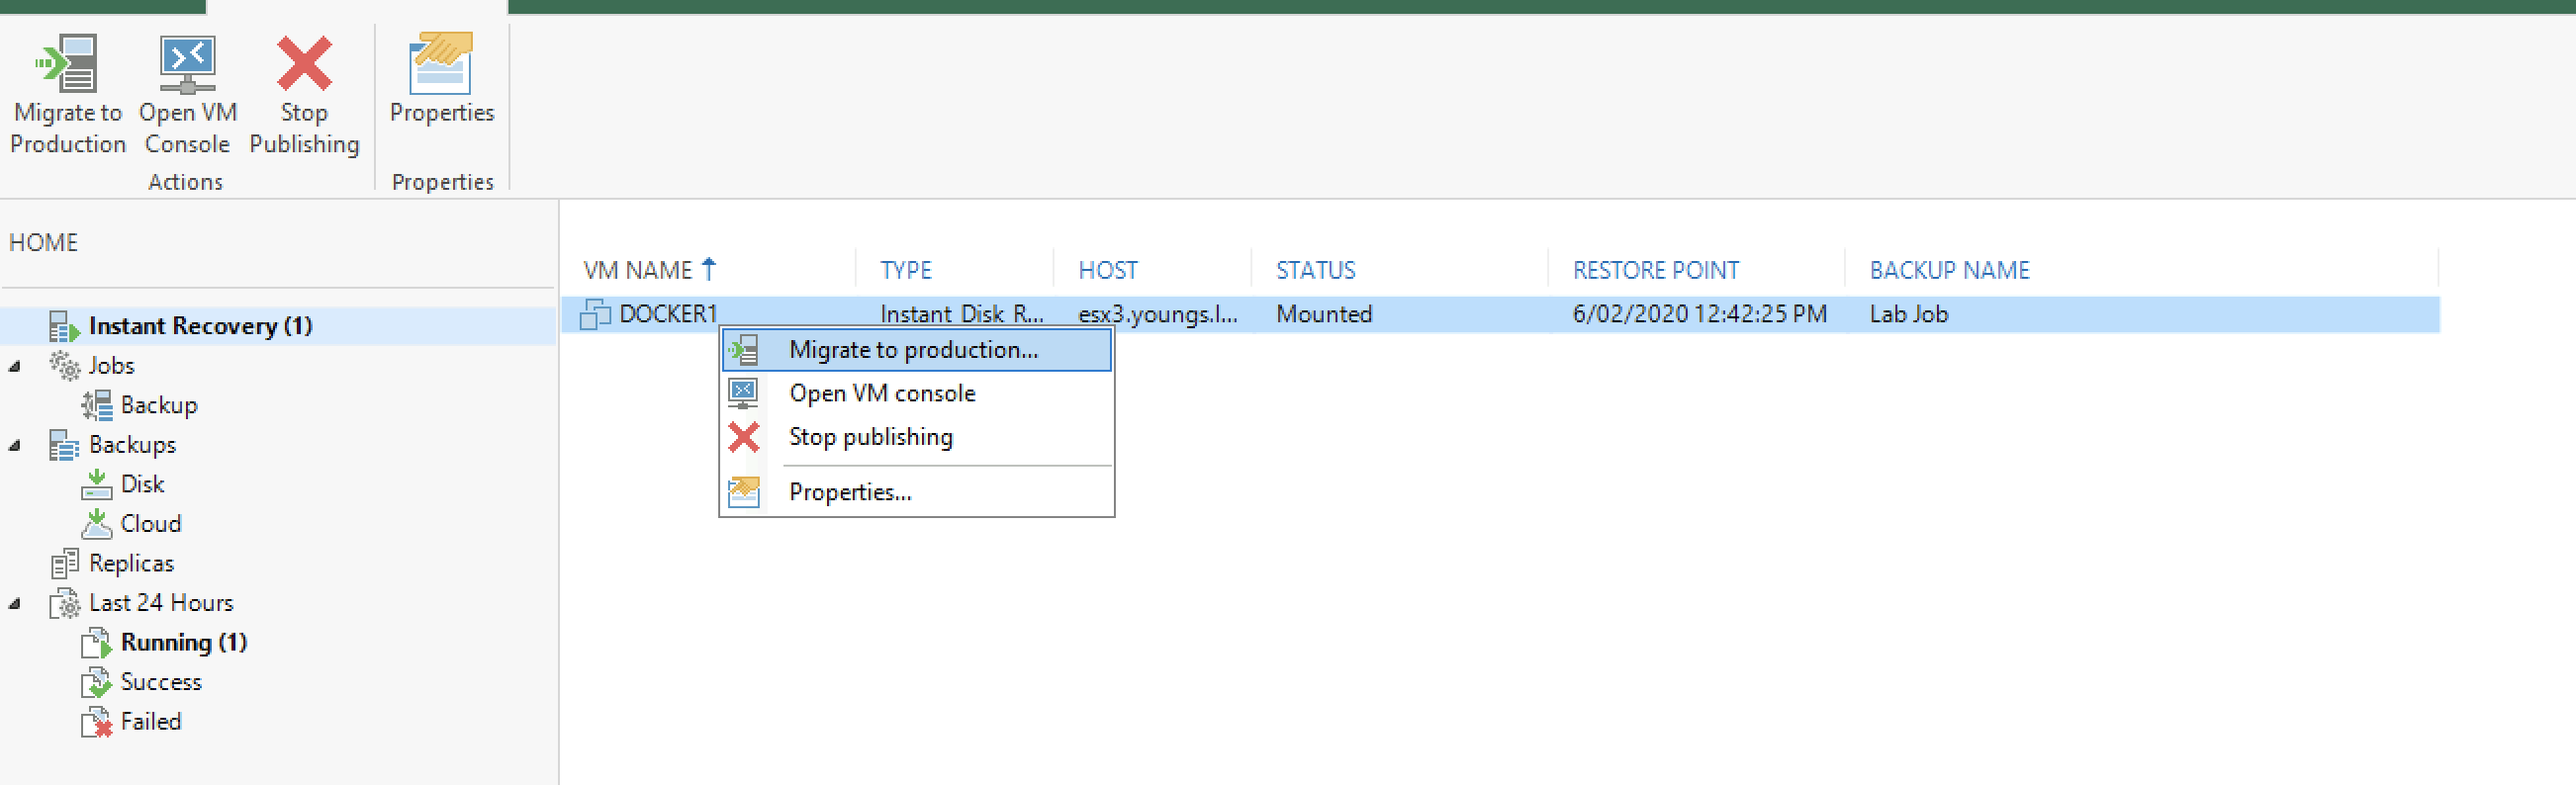
In Veeam you will see the Instant recovery node now it is all there. You can then right-click this and have the options you are used to with the full virtual machine instant recovery such as stop publishing or migration to production (keep it).
Pretty neat, we will be using this every week.
I will be waiting for some of the PowerShell documents to come out around v10 and I may even try to wrap my API around some PowerShell remoting to automate this end to end for our customers.