One of the most eagerly awaited features in the Veeam B&R v10 release is the NAS backup feature. It is finally here and supports SMB and NFS file shares.
Adding a file share
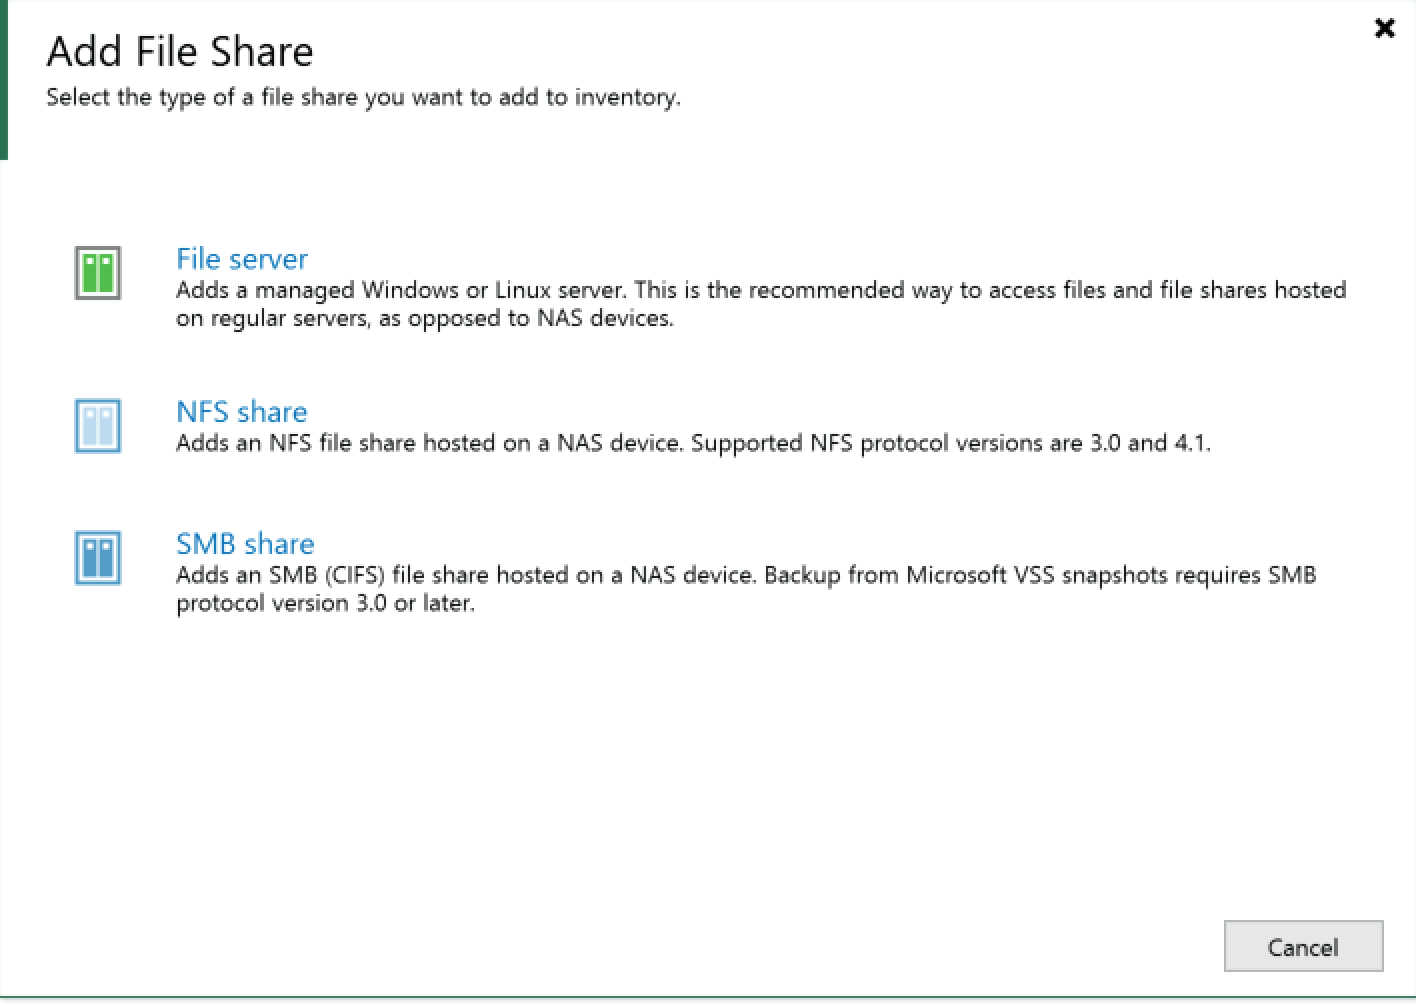
You first need to add a file share to your inventory. Hit up the inventory section on the client and right File Shares and then add one. You will be asked what type of file share you wish to add. File Server, SMB or NFS share.
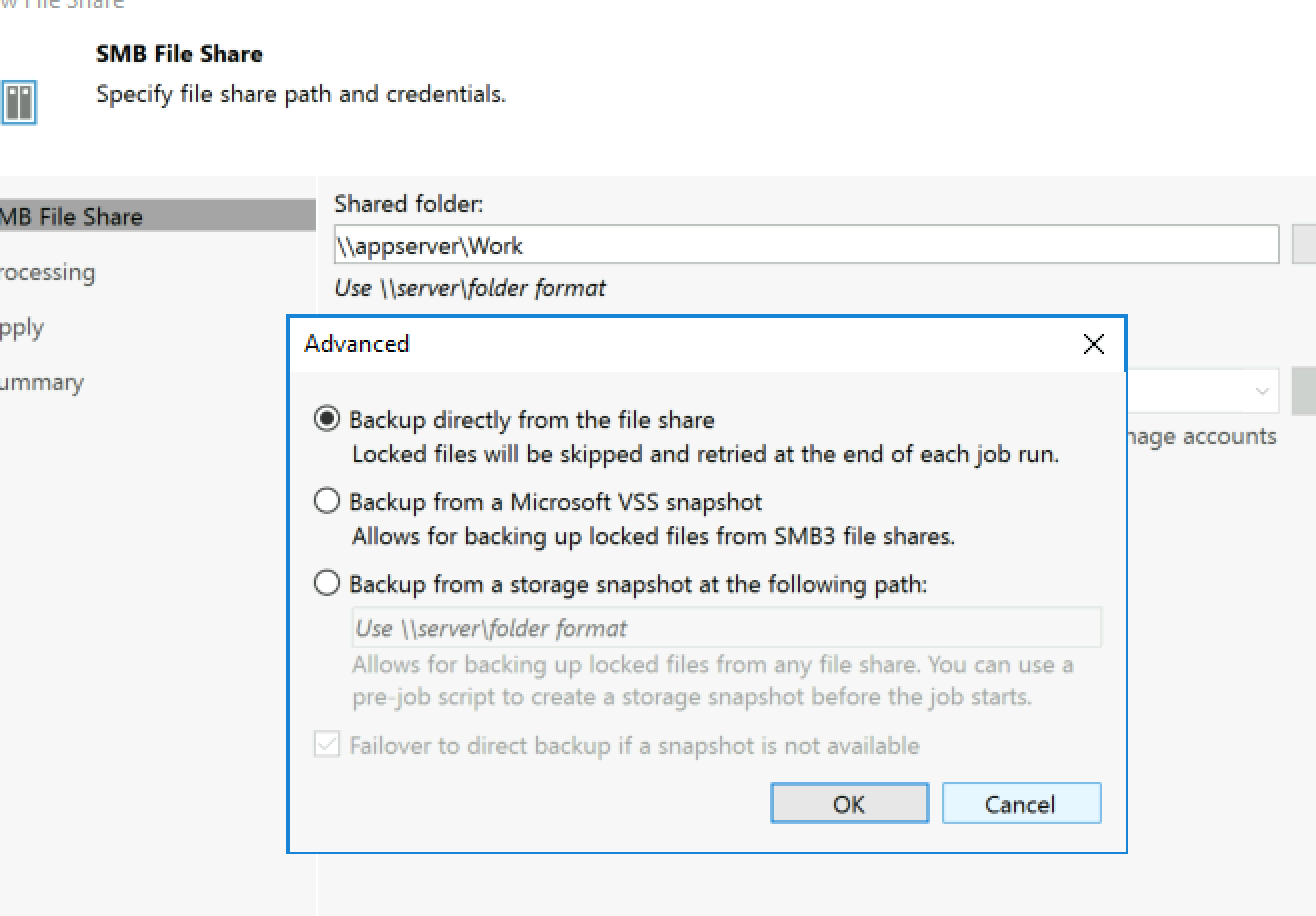
We will be looking at an SMB share in this example.
Enter the path or select browse and find your desired share. If required you can add credentials to access this share below the path entry.
Under the Advanced button, you have some options depending on what type.
For SMB
In addition to backing up directly, you can back up data from Microsoft VSS snapshots or native storage snapshots. this speeds up backup operations
For NFS
In addition to direct backup, you can backup from native storage snapshots.
An example here for SMB
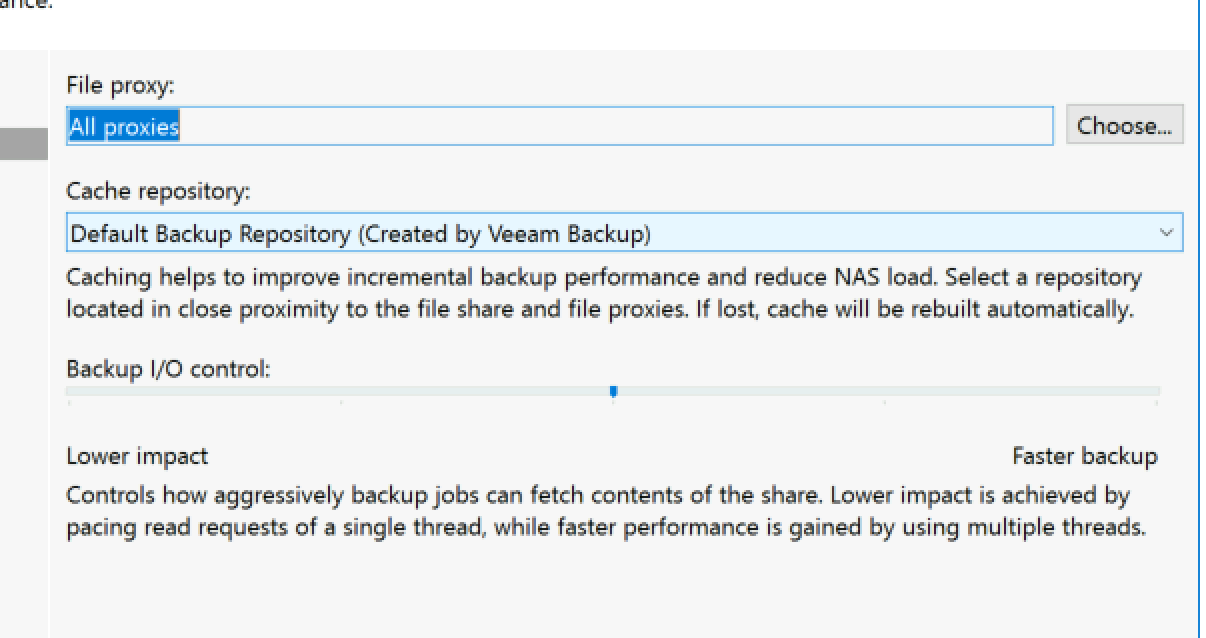
Processing options
For the job, you can select some processing options such as which proxies to use, where the cache should live (where temp cache files are stored).
You can also slide the Backup I/O control slider to the desired setting depending on how powerful the NAS. If it is already under load reduct to the lower impact side, otherwise let it rip.... or sit on the fence and keep it in the middle. Either way, you can monitor once you have a job(s) running.
Now confirm everything to save your file share. It will then appear in the list ready for use.
Adding a NAS backup job
On the home tab, add a new backup job of type File Share. Give it a name and then move onto the files/folders step.
Click add to bring up the browser, you will see your new file share created earlier in inventory. Select the folder you want to backup.
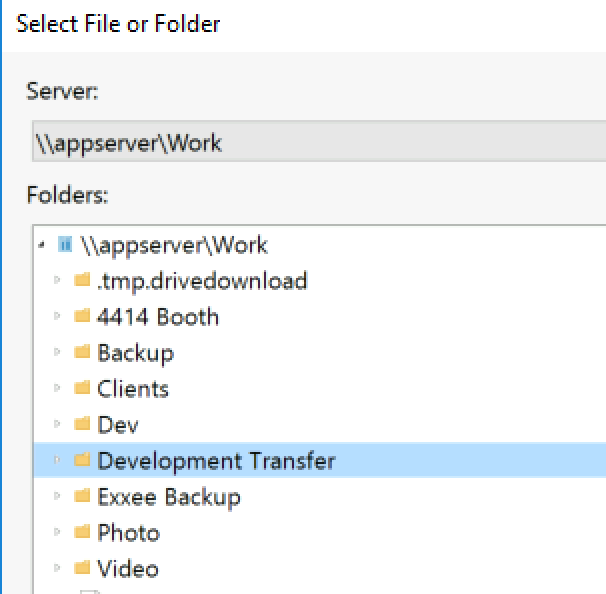
Once you have selected it will be added to the list, you can add more folders to backup in this same job if needed.
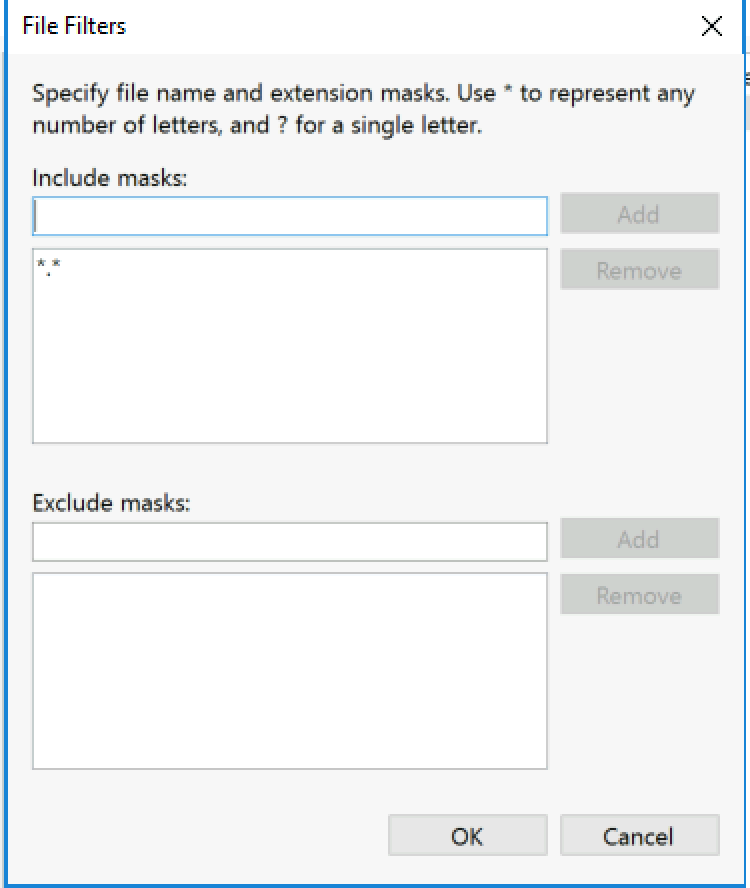
Note that the file mask is set to All files

To configure specific exclusions/inclusions highlight the folder and hit the advanced button down the bottom right. Enter as desired.
Now onto storage selection. Enter your desired retention settings and where your backups should be located. I have gone for a simple 7 days worth of file versions.
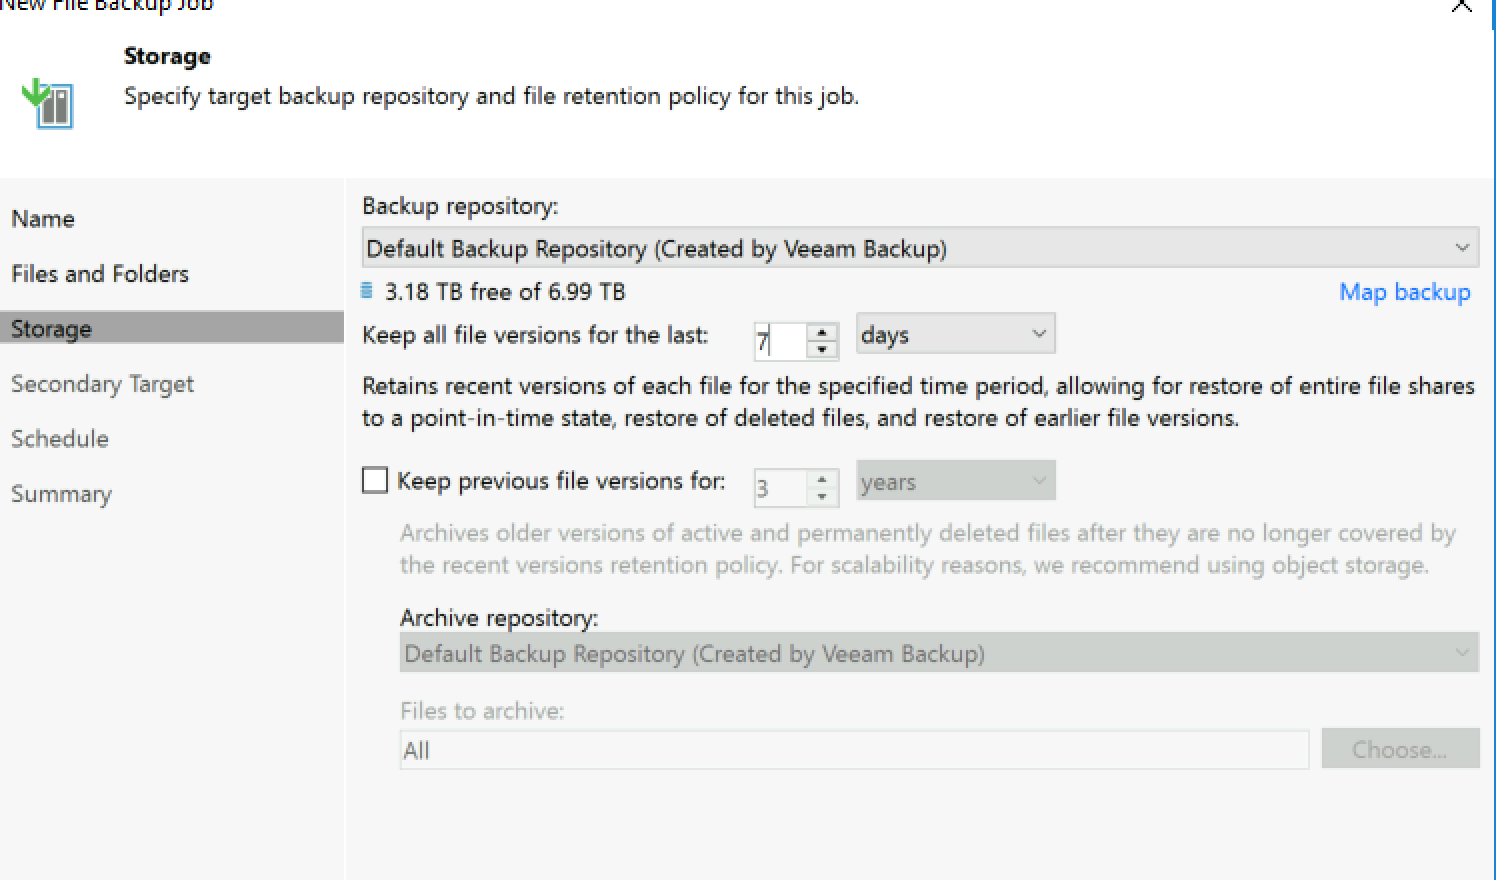
You can also select your preferences around previous file versions and archival as required.
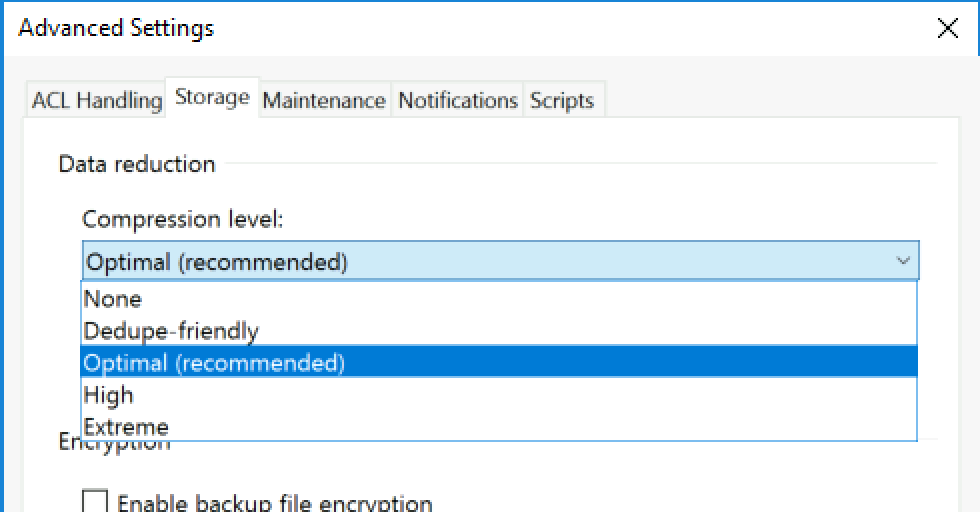
There are some advanced settings on this step also. Click this to bring up a dialogue allowing you to select how it handles ACL's, compression and encryption.
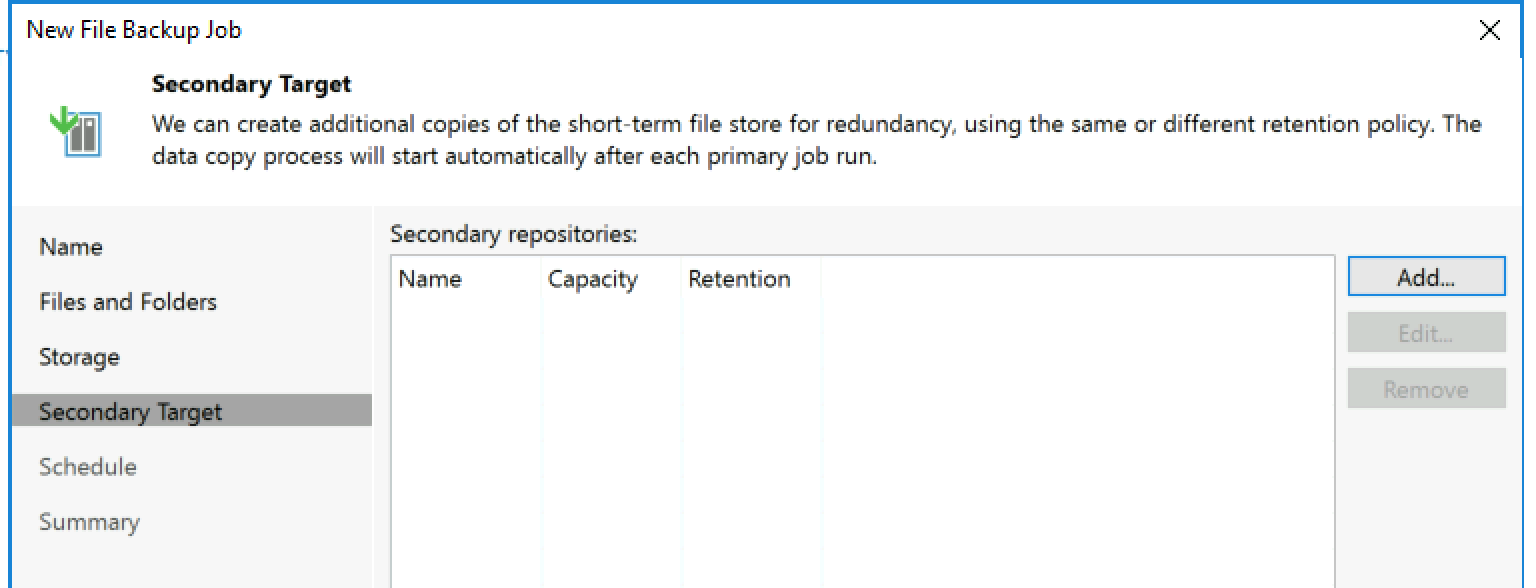
Now move onto the secondary target repository which is a great feature. If you wanted to take advantage of this then simply add one. I am leaving this blank on my lab.
Now, move through the rest of the wizard which will be somewhat familiar such as schedule.
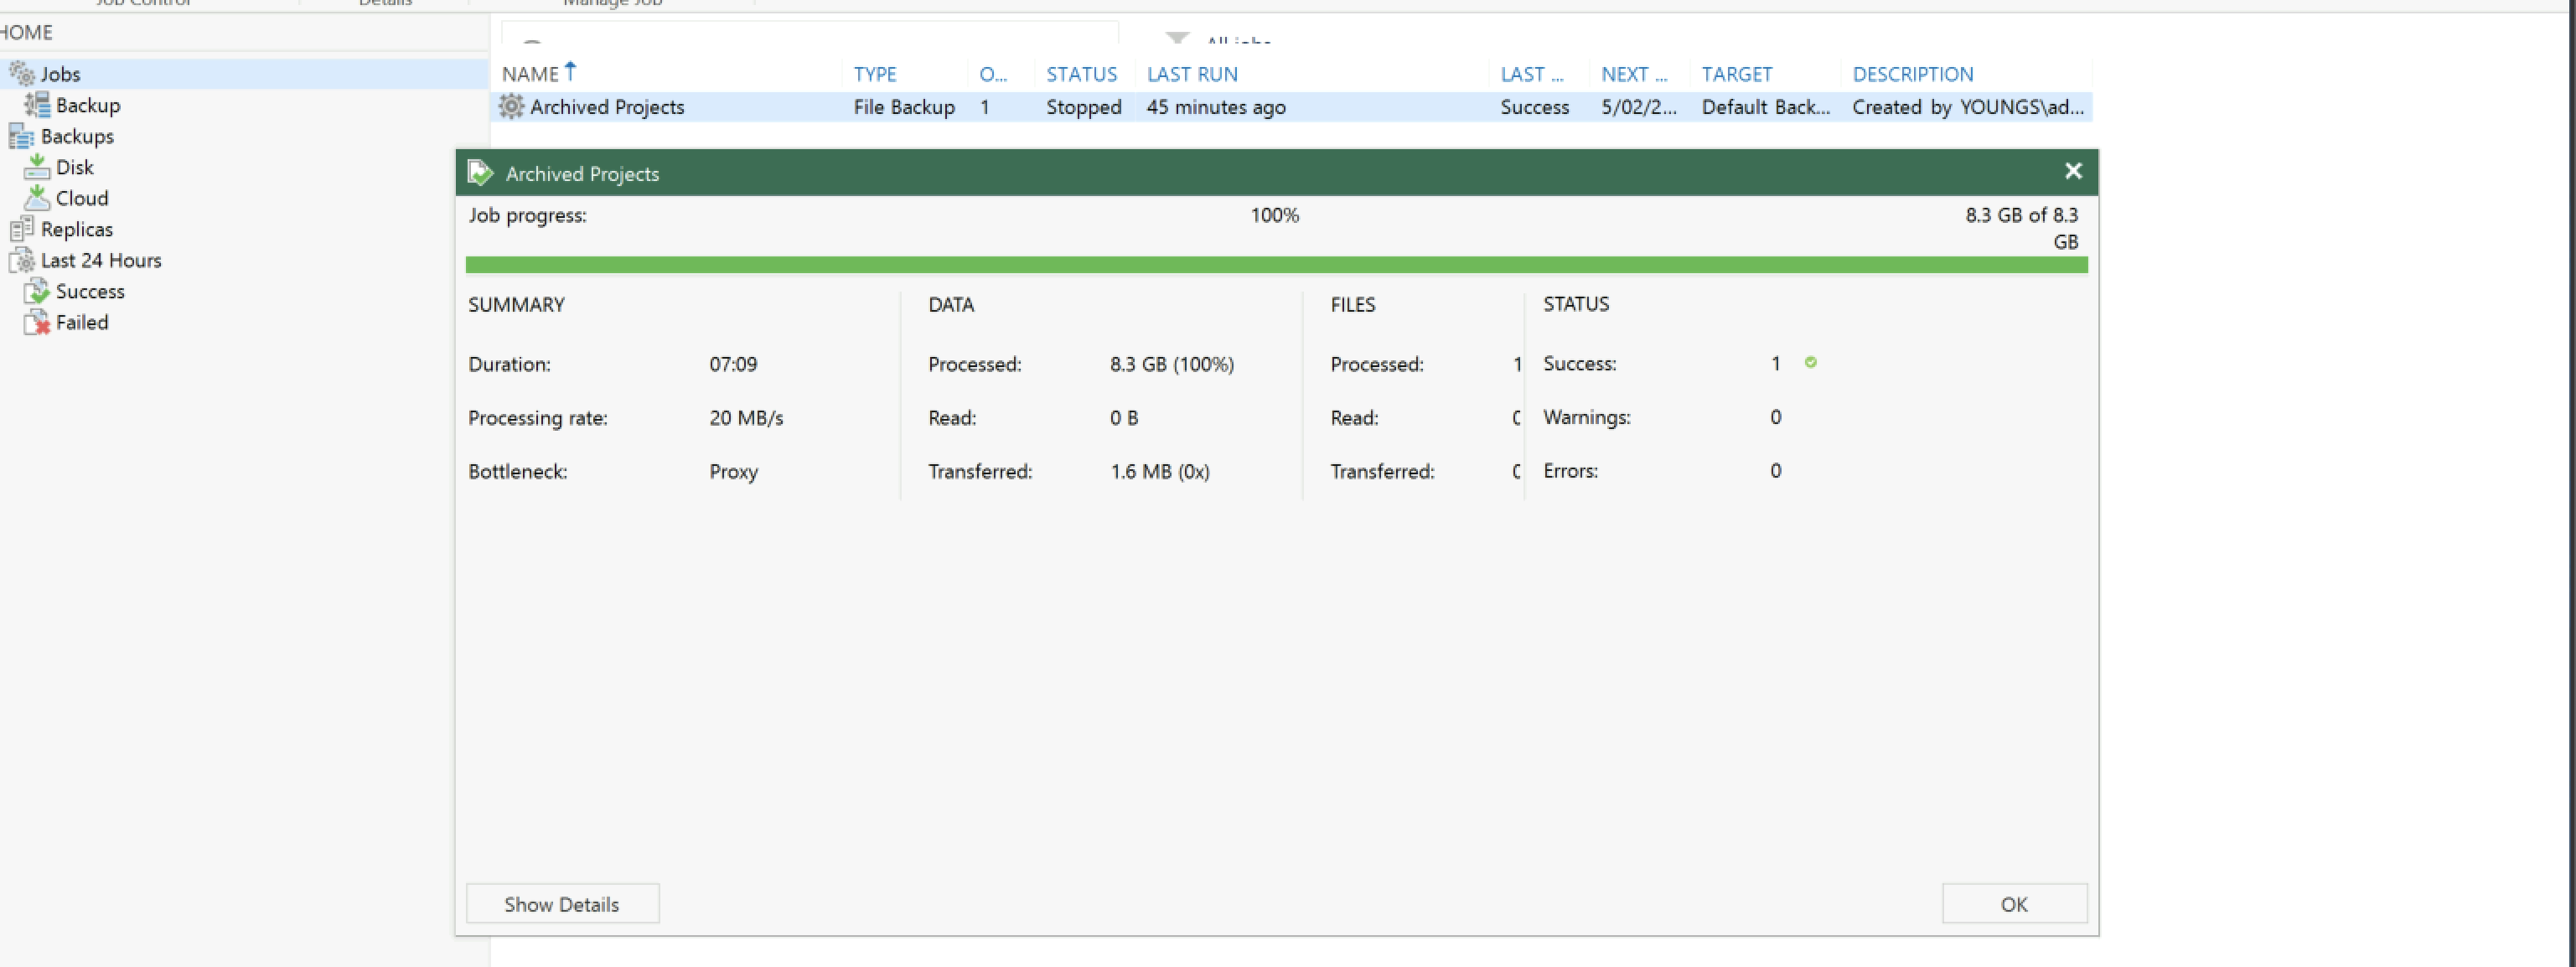
Now run the job! or wait. But I couldn't wait.
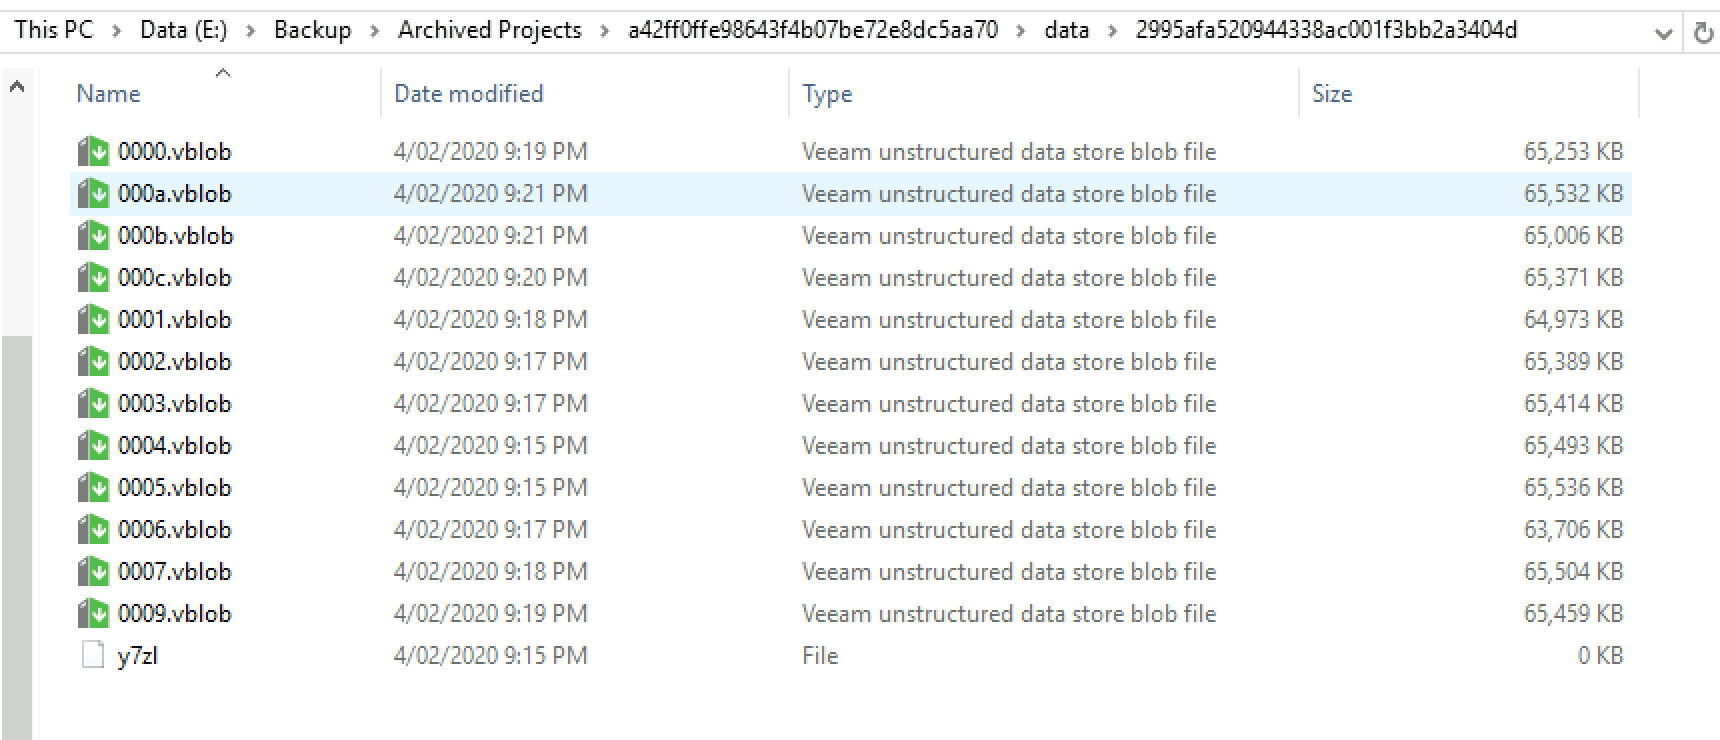
First run
Once the job kicks off this is what you will see on disk.
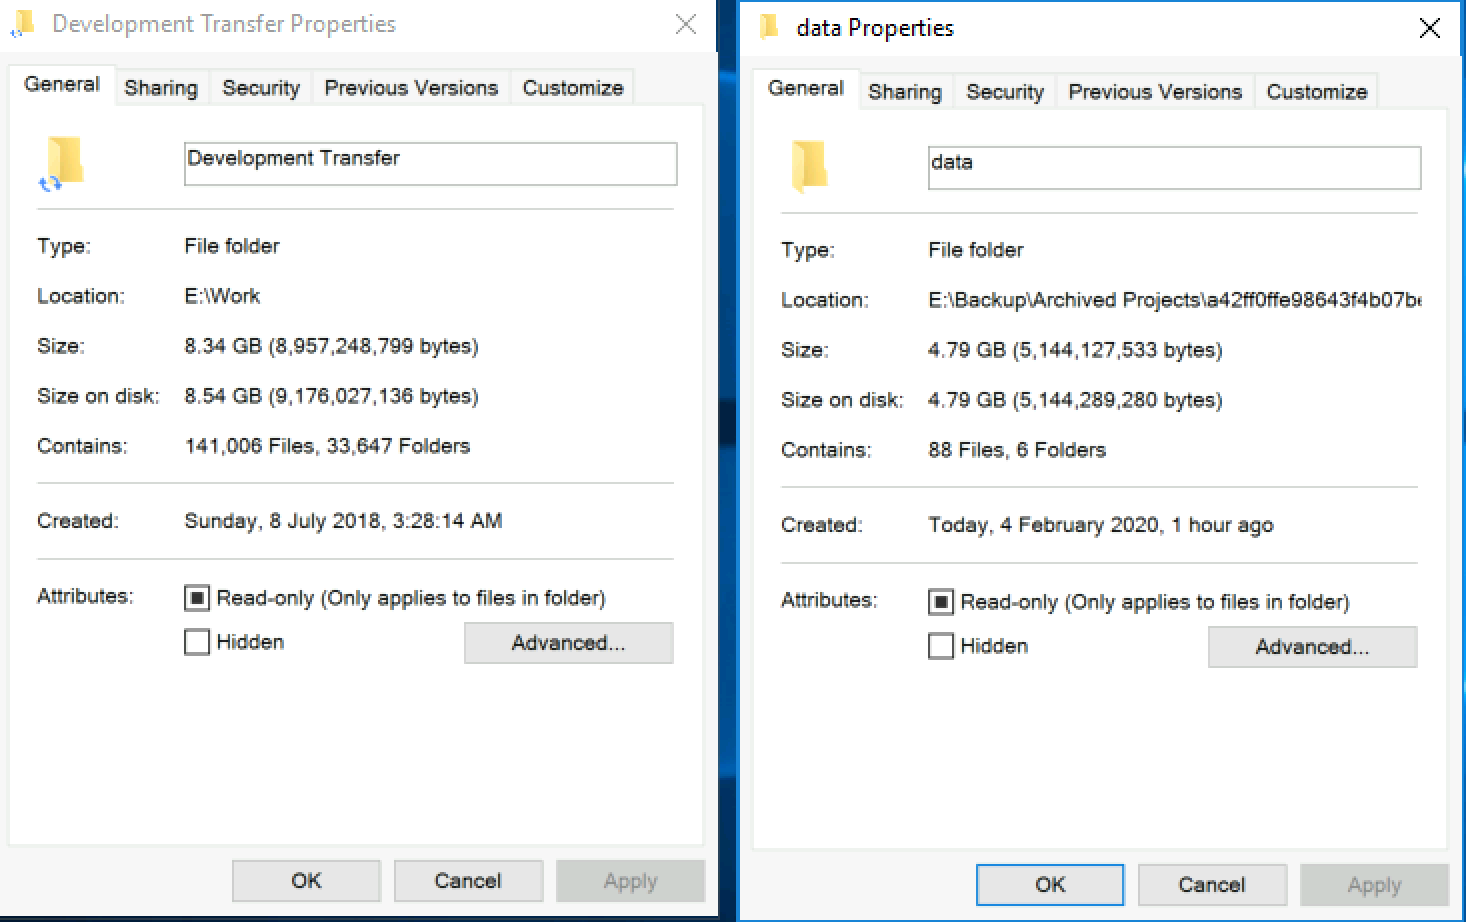
The job ran successfully and with no changes to the original data here is a comparison of the source side vs the backed upside after the first run.